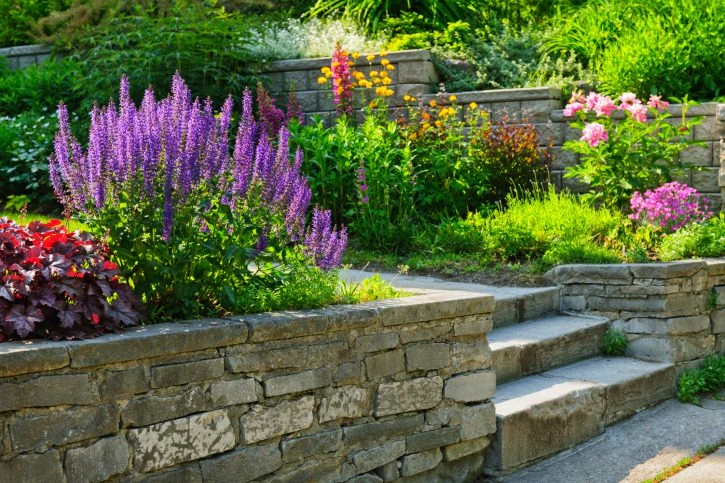
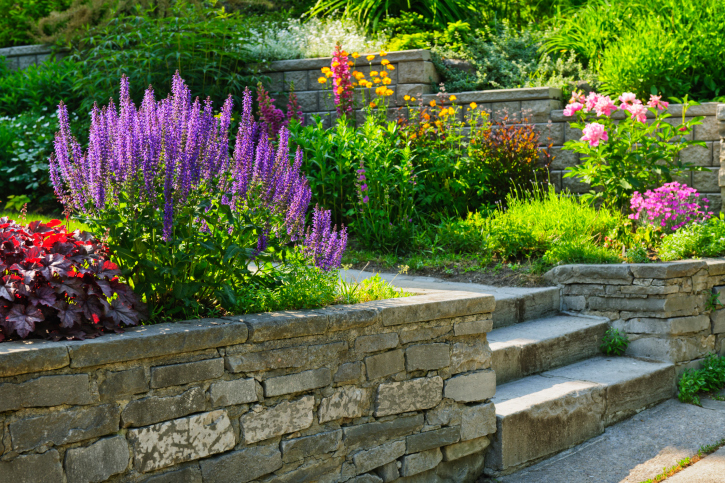
There are many retaining walls to consider, but block retaining walls can add an elegant, artistic look to your terrace, garden, or yard. While they give off the appearance of simplicity and strength, there are several necessary steps that go into creating this powerful look. Here is our list of 5 steps that go into building a block retaining wall.
 1. Check Codes
Before anyone can begin installing a retaining wall, there is a possibility that your Home Owner’s Association could have regulations that would prohibit you from building your block retaining wall. Be sure to thoroughly investigate this issue before beginning the project so as not to waste time and energy in a project you do not have permission to complete.
At New Life Rockeries, our retaining wall contractor experts are familiar with all of the Washington State standards and regulations for construction projects for block retaining walls. Your project is safe with us.
2. Decide Your Blocks
First you must choose what kind of blocks you want to use that will match the environment of your home and generate the appropriate atmosphere. The two main options are concrete and stone blocks. But do not be fooled into thinking that your options are limited. Concrete blocks can have different shapes and structures as well as unique colors and textures. For stone walls, you have the option of rubble, cut stone, and boulder walls that can be built to make the outside of your home look elegant and tasteful.
Processing all the available options and selecting the perfect block for your wall and home can be overwhelming and discouraging. Our experts here at New Life Rockeries would be happy to bring their experience to the table to help you choose a block that will match your exterior perfectly.
3. Begin the Foundation
When beginning your wall, any construction worker or engineer will tell you that the foundation is one of the most important parts of a structure. A poorly laid foundation can cause additional work later on in the project and can result in a wall that looks strange and insecure.
We will start by measuring out where you will want your future wall to go. Most people use stakes and string, or they simply lay a garden hose to mark the line of your wall. Then we dig a level trench where you will want your retaining wall to be. These trenches are normally dug six inches deep, but the depth is normally dependent upon the size of the chosen blocks. Once the trench has been dug, be sure to compact its underlying soil and spread a layer of paver base to provide a secure and solid foundation for the bricks to be laid on top.
4. Lay the First Course
A course in this context is essentially a layer of block. As the first course is laid, it is critical to confirm that all the blocks are level front to back and side to side. This can be measured every few feet. If some blocks are uneven, it is easy to add some paver base and adjust as necessary. This is to protect against a wall that leans or tips, and it will ensure the strength and longevity of your retaining wall.
There will be a cavity left behind your foundational course. In order to keep soil from creeping in between your blocks, we will lay some landscape fabric along the backside of your course in between the blocks and the soil. Any cavity remaining between the fabric and dirt can be filled with gravel.
5. Lay the Remaining Courses
Next, our builders continue to lay more courses to increase the height of your wall. Different kinds of blocks are meant for different heights, so it is important to make sure that the blocks are capable of creating a secure wall at the height you want. This is where an expert can be invaluable, able to guide you through this process and ensure that your wall is up to par with best-practice standards.
As the courses are being laid, builders must continually check to be sure the blocks are level so as not to end up with a wall that appears crooked or angular. When applying the final course, we sweep away any debris or dirt on the previous layer and apply a construction adhesive when laying the final course to ensure that your last course is secure. Finally, we cut off and cover up any excess landscape fabric.
The environment and landscape of your home, the areas where you would like walls, and what you want the final outcome to look like can make the selection, preparation, construction, and completion of a retaining wall seem like an overwhelming task. Luckily, at New Life Rockeries, we work with customers to learn what they want the final outcome to look like, and then we do all the heavy lifting. By partnering with New Life Rockeries, you are free to dream about your home’s potential without the threat of time consuming decisions and exhausting manual labor. We would love to work alongside you to make your home a place of beauty and wonder.
To learn more about our services here at New Life Rockeries, feel free to give us a call, or fill out our contact form.