5 Steps When Installing Block Retaining Walls

5 Steps When Installing Block Retaining Walls

Request a Quote

5 Steps When Installing Block Retaining Walls

There are many retaining walls to consider, but block retaining walls can add an elegant, artistic look to your terrace, garden, or yard. While they give off the appearance of simplicity and strength, there are several necessary steps that go into creating this powerful look. Here is our list of 5 steps that go into building a block retaining wall.
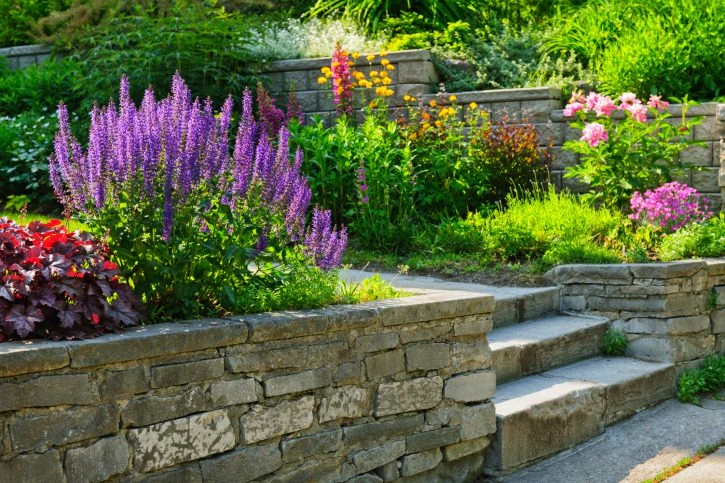
how-to-build-retaining-wall-seattle1. Check Codes

Before anyone can begin installing a retaining wall, there is a possibility that your Home Owner’s Association could have regulations that would prohibit you from building your block retaining wall. Be sure to thoroughly investigate this issue before beginning the project so as not to waste time and energy in a project you do not have permission to complete.

At New Life Rockeries, our retaining wall contractor experts are familiar with all of the Washington State standards and regulations for construction projects for block retaining walls. Your project is safe with us.

2. Decide Your Blocks

First you must choose what kind of blocks you want to use that will match the environment of your home and generate the appropriate atmosphere. The two main options are concrete and stone blocks. But do not be fooled into thinking that your options are limited. Concrete blocks can have different shapes and structures as well as unique colors and textures. For stone walls, you have the option of rubble, cut stone, and boulder walls that can be built to make the outside of your home look elegant and tasteful.

Processing all the available options and selecting the perfect block for your wall and home can be overwhelming and discouraging. Our experts here at New Life Rockeries would be happy to bring their experience to the table to help you choose a block that will match your exterior perfectly.

3. Begin the Foundation

When beginning your wall, any construction worker or engineer will tell you that the foundation is one of the most important parts of a structure. A poorly laid foundation can cause additional work later on in the project and can result in a wall that looks strange and insecure.

We will start by measuring out where you will want your future wall to go. Most people use stakes and string, or they simply lay a garden hose to mark the line of your wall. Then we dig a level trench where you will want your retaining wall to be. These trenches are normally dug six inches deep, but the depth is normally dependent upon the size of the chosen blocks. Once the trench has been dug, be sure to compact its underlying soil and spread a layer of paver base to provide a secure and solid foundation for the bricks to be laid on top.

4. Lay the First Course

A course in this context is essentially a layer of block. As the first course is laid, it is critical to confirm that all the blocks are level front to back and side to side. This can be measured every few feet. If some blocks are uneven, it is easy to add some paver base and adjust as necessary. This is to protect against a wall that leans or tips, and it will ensure the strength and longevity of your retaining wall.

There will be a cavity left behind your foundational course. In order to keep soil from creeping in between your blocks, we will lay some landscape fabric along the backside of your course in between the blocks and the soil. Any cavity remaining between the fabric and dirt can be filled with gravel.

5. Lay the Remaining Courses

Next, our builders continue to lay more courses to increase the height of your wall. Different kinds of blocks are meant for different heights, so it is important to make sure that the blocks are capable of creating a secure wall at the height you want. This is where an expert can be invaluable, able to guide you through this process and ensure that your wall is up to par with best-practice standards.

As the courses are being laid, builders must continually check to be sure the blocks are level so as not to end up with a wall that appears crooked or angular. When applying the final course, we sweep away any debris or dirt on the previous layer and apply a construction adhesive when laying the final course to ensure that your last course is secure. Finally, we cut off and cover up any excess landscape fabric.

The environment and landscape of your home, the areas where you would like walls, and what you want the final outcome to look like can make the selection, preparation, construction, and completion of a retaining wall seem like an overwhelming task. Luckily, at New Life Rockeries, we work with customers to learn what they want the final outcome to look like, and then we do all the heavy lifting. By partnering with New Life Rockeries, you are free to dream about your home’s potential without the threat of time consuming decisions and exhausting manual labor. We would love to work alongside you to make your home a place of beauty and wonder.

To learn more about our services here at New Life Rockeries, feel free to give us a call, or fill out our contact form.

Related Posts

Backyard Waterfalls: Waterfall Landscaping Ideas for Your Back Yard

There are many different options when it comes to landscaping your yard. Choices vary from rockeries and fountains to trees, bushes, and more. These waterfall landscaping ideas for your backyard or as a feature point in any other areas of your home can greatly complement each other. Let’s look at some photos and general info of the possibilities available to you. 1. Waterfall Landscaping A waterfall is an attractive landscaping addition to any yard, whether you have a small or large amount of space available. Beautiful rockery siding, accompanied by a trickle of a cascading waterfall, and accented by colorful rocks would be a wonderful decoration that would provide an atmosphere of peaceful tranquility. 2. Landscaping with a Fountain Fountains can provide a very different look compared to waterfalls, and they are usually easy to install and maintain. Here are three choices for water landscaping ideas with fountains: A. Spouting Fountain The spouting fountain is a commonly chosen fountain because it provides a dramatic effect wherever you install it. It can be easily added as the installation process is simple and it only requires a submersible pump. It can be paired with a statue that you favor, or, if you would just like to make things simple, install a spouting statue. The ideas are endless. The fountain also has the option of spraying water in a certain pattern, such as a ring or bubble, which provides even more decorative options. B. Cascading Fountain Unlike the dramatic spouting fountain, the cascading fountain is more subtle. As opposed to using a pipe to spray water, this fountain is designed so that water spills down multiple levels, each one overflowing and pouring into the next. Cascading fountains can be found in a wide range of sizes in order to fit whatever the landscape design your waterfall landscape design requires. These fountains are easy to add because they are usually self-contained (everything needed is inside the unit). C. A Pondless Fountain Pondless fountains take up less space than other water features and may be the option for you. They draw their water from underground, and their base is usually made from non-traditional materials, such as an urn, column, or boulder. The pond or fountain is placed on a bed of gravel or another kind of rock that allows the water to drain to the reservoir underneath it, thus creating a look that differs from other kinds of fountains. Whether you choose to install a waterfall or a fountain in your yard, each will greatly enhance and add to the look of your rocky waterfall landscape. Are you looking for a garden landscape that you only see in photos? It’s a sign! You have come to the right place! If you have questions, require information, or would like to install some sort of rockery with a waterfall or fountain views in your yard, go ahead and sign up and contact us today!

Read More »

Improve House Curb Appeal: Ideas for Small Homes with Gardens

Do you have a small house that requires you to add curb appeal? Perhaps you’re having trouble distinguishing your home from the others on your street. The truth is that if you can’t improve your home’s curb appeal, you can miss out on prospective buyers, tenants, or visitors. First impressions are important, and the exterior of your home is the first thing visitors notice when approaching. The good news is that there are numerous simple home repair options that can improve the curb appeal of any size property that does not necessarily cost a lot of money. So, pay attention to our top tips to improve the look of your sidewalk, walkway, and the outside of your house. In this piece, we’ll look at some of the best ways to make your home a better home for as little money as possible, where possible. From a new mailbox to a new lick of paint or something simply to replace the light fixtures; can drastically improve the value of your house and make you competitive in the buyers’ market, if you are interested in selling your house.   Why Is a Home’s Curb Appeal Important for Small Houses?   Curb appeal is essential since it has a significant effect on a property’s overall impression, value, and as a result, the market asking price of your house. Your real estate agent will tell you the exact same thing. Better homes have lovely gardens. The first step towards creating a welcoming and lovely exterior is to evaluate your home’s curb appeal. When deciding how to improve your home’s curb appeal, consider it from the perspective of potential buyers or a real estate agent. Examine the outside of your home and make a list of any places that require attention. Is it time to re-paint your house, or replace the old roof with a new roof? Does anything require a thorough cleaning? Is there anything about the exterior of your house that should be improved? A splash of paint or something as simple as a new mailbox could make your house look more attractive.   After you’ve evaluated the facade of your home, it’s time to determine its best features. This might be anything from a distinctive architectural design to a lovely tree in the front yard. These additions might help you increase the curb appeal of your home. From pulling weeds to clearing your driveway and upgrading the siding of your house – all these factors will increase buyers’ interest and sale potential.   Door Hardware Can Add a Special Touch to Your Front Door & Front Porch   Consider adding some comfortable outdoor furniture to your gorgeous front porch, for example, to make it more appealing. Better homes are always comfortable. If your property has a specific architectural style, consider adding some ornate hardware to the doorway of your front porch to accentuate its distinguishing elements.   Overall, assessing your home’s curb appeal, recognizing its best aspects, and establishing a budget and timeframe are all critical elements in improving the curb appeal of your tiny house. You can build a welcoming and appealing home that will appeal to potential home buyers and add value to your property by taking a critical look at your home’s exterior and making smart improvements in its appearance. Improving your home’s curb appeal can make a huge impact on its overall appearance and value. A poorly kept or unsightly exterior, on the other hand, might detract from a property’s value and even discourage potential purchasers. Investing in curb appeal can therefore be a worthwhile and rewarding activity for homeowners.   The Advantages of Increasing Curb Appeal to Create Better Homes   Aside from enhancing the value of your home and attracting possible buyers, improving the curb appeal can also increase your pleasure of your property. A lovely facade can instill pride and happiness in homeowners while also improving the overall beauty of the area. Curb appeal can also make your home more desirable to guests, and it can even improve your social life by providing a welcoming area for outside meetings and events. By improving your home’s curb appeal, you can increase its financial value as well as its personal and social value. It is a worthwhile investment with both short and long-term rewards.   Attracts Prospective Buyers   A property with strong curb appeal looks good at first glance and set the tone for the rest of the home tour. It can give purchasers confidence in the property’s upkeep and maintenance, which can lead to a faster sale at a better price. Investing in curb appeal is a wise move for any homeowner trying to sell their home, and it can also create a sense of pride and delight in the appearance of your home for those who intend to stay for the long term.   Boosts Neighborhood & Street Aesthetics   Long-term advantages of selling your home include improving the attractiveness of the community. When your neighbors take pride in their homes and invest in curb appeal, the community as a whole becomes more desirable. This may result in increased demand for homes in the neighborhood and higher sale prices in the coming years.   Enhances Home & Street Security   Improving your home’s security is another significant advantage of improving curb appeal. You may dissuade criminals and make your property seem safer by investing in external light fixtures, cutting hedges and trees, and keeping the outside of your home clean and maintained. Finally, boosting the curb appeal of your home can simply make you happier and more content with it. A lovely façade can boost your sense of ownership and make you more eager to spend time outside. So, whether you intend to sell your property soon or simply want to enjoy it more, investing in curb appeal is a wise decision. How to Improve the Curb Appeal of a Small House   Start With a Plan   Assessing the curb appeal of the

Read More »

English Garden Designs: Design & Style Ideas for Small Gardening Projects

The English garden style is known for its rambling, old-world charm. Stony nooks and crannies are filled to bursting with foliage, and the requisite ramshackle grace allows mother nature to prosper.   English gardens make strong use of shale walls, gravel, and stone pathways, rose arbors, and pots of herbs clustered around doorways. These gardens feature extensive use of rocks or stones along pathways and surrounding groups of plants within the garden.   English Landscape Gardens The Origin of the English Rock Formal Gardens The traditional English country garden originates from the design of gardens around cottages in the 1800s. Just before the gardening reign of William Robertson. These gardens were required to be useful, they are not simply beautiful gardens. Because of this, English rock gardens are usually designed with a combination of ornamental and edible plants. Lush plantings from spring bulbs to fruit trees, and the various summer lush plantings and combinations for English gardens are absolutely endless. In fact, traditionally every plant grown in English country gardens was used either medicinally or for food. Quaint Space & Versatility The English rock garden depends on providing a sense of grace and charm, rather than impressing with a grand formal structure. Instead of properly trimmed bushes and precisely planted patterns of flowers, the rock garden will utilize vines such as ivy, runner beans, potato vines, or climbing roses that tumble over the shale old stone walls.   These walls usually appear to be loose stone and function as retaining walls as well as accent pieces in English gardens. Stones Help To Manage Natural Growth English rock gardens tend to be small and dense, using informal design and traditional materials. Their size makes them a viable option for even the smallest of backyards. The stones helped to reduce the natural spread of growth, as well as reducing the necessity for extensive weeding. Stone pathways of coarse gravel or flat flagstones were used as they required little care and have a pretty appearance. These pathways were kept clear of weeds primarily by the consistent passing of feet. Various stones can be used in English gardens. Lush Plantings of Herbs Herbs are frequently placed in clay pots or in small garden patches right around the doorways, closely surrounded by heavy stones. Kitchen cooks may easily step outside and snip off a few leaves to use while cooking.   Herbs that are also delicate are more likely to survive harsh winters as the warmth from the home will prevent them from dying of frost. The stones and clay pots also help to keep the herbs warm, allowing them to grow sooner in spring and last longer through the autumnal months. Traditional Plants: Herbs and flowering veggies, such as onions, sweet peas, and squashes from English Gardens Other traditional favorites include hollyhocks, yarrow, columbine, foxglove, crocus, climbing hydrangea, iris, dead and stinging nettles, lavender, poppy, sage, thyme, quince shrubs, tulips, bachelors buttons, bee balm, and peony.   Easy Tending: The English cottage garden depends upon not require much maintenance. The densely planted surface area leaves little room for weeds, and the separations between them are protected by stones.   This dense planting method may take some years to cultivate, especially if many annuals must be planted each spring.   Primarily, however, perennials and seed heads that reseed themselves are used in such gardens to limit the necessity of heavy spring tending.   Aged Beauty: The charm of the English garden is the feel of age that they have. Rose arbors and old stone walls, covered in ivy obviously will take some time to grow. You can contribute to the seeming age of the garden by introducing moss onto the rocks that border the paths, as well as training quick-growing vines over the retaining walls until the rose vines or ivy have grown larger.   You can also help to create an illusion of an old garden by interspersing among each other. Perennials naturally try to take over the areas possessed by their neighboring plant species, eventually blending together into a seamless beautiful bed.   As you’re planting, allow some bulbs or cuttings to spill over the borders into neighboring plant territories. (Do NOT do this with aggressive plants, or they will take over your garden!) Garden Stones English rock gardens will usually incorporate shale, limestone, and sandstone. The retaining walls are usually a range of grey stones from charcoal to light cream grey. Explore the enchanted world of the English garden with us as we enter a world of ageless and rustic elegance. This design captures the attention of viewers by using beautiful scenery, winding pathways, and rich vegetation that evokes elegance, charm, and inspiration.   The charm of the English garden rests in its capacity to take us back in time, where organic rules and nature’s whimsy prevails.   English Gardens To Fill Small Spaces English Gardens That Feel Like a Fantasy The English Garden is versatile and adaptable so it can be made to fit any area. You may create an outdoor haven bursting with old-world charm, whether you have a large yard or a small space. To change even the smallest outdoor spaces around, choose plant mixes, add focus points, and let your creativity go wild. A New Dawn For English Gardens Come along as we explore the mysteries of the English garden and show you how to make your own personal paradise. We’ll look at the components that make up this classic design, from rambling roses to brilliant bulbs, meandering paths, and fairytale landscapes. Allow the splendor of the English garden to spark your creativity. Many Gardeners Replicated Surrounding Landscapes The idea of a rock garden originated in the 18th century when English gardeners attempted to replicate the natural landscapes they had seen while traveling. They started using rocks and stone walls in their garden designs after being inspired by the rough topography of the Swiss Alps and the lovely backdrop of the Mediterranean. Plant Combinations Create A Useful

Read More »