Types of Gravel – Learn From These Tips
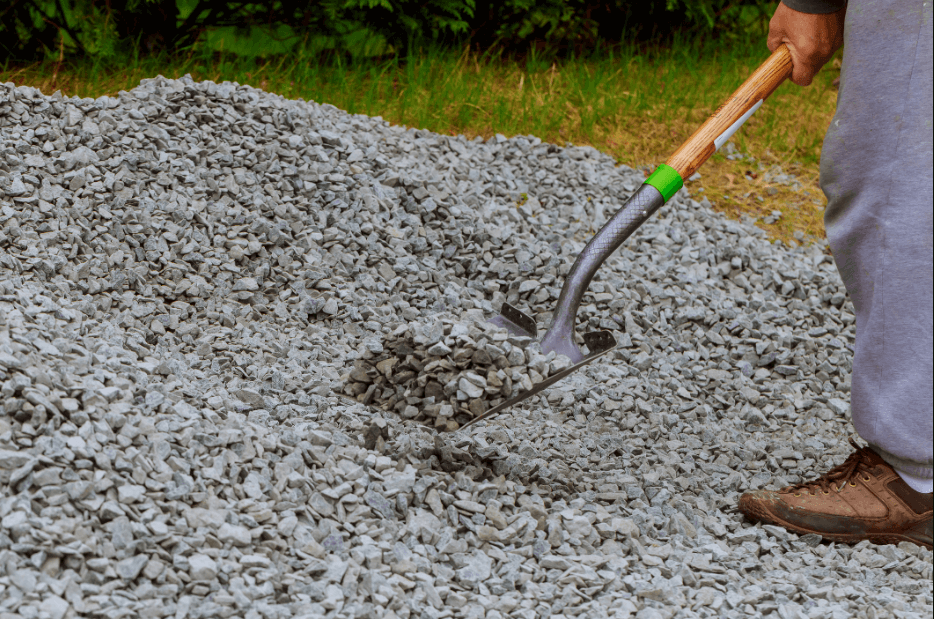
If you’re new to the landscaping scene and want to use your extra downtime to start improving your knowledge of landscaping and work on an outdoor project or two, here’s some helpful information for individuals learning about the different types of gravel. Different Types of Gravel Explained There are various types of gravel each with a different look, set of capabilities, and purpose. Here’s a brief overview of three of the most common types of gravel. Types of Pea Gravel Available in numerous colors, pea gravel is ideal for pathways, playgrounds, patio fill, and for drainage. Pea gravel has a smooth finish and makes for an aesthetically pleasing material. No matter what you use pea gravel for, you can be certain it will look luxurious and delicate. Types of Crushed Stone Gravel Crushed stone gravel is usually made up of limestone or granite that’s been broken down into small pieces. As crushed gravel is composed of aggregate (limestone or granite) it’s main colors include gray or whitish shades. Crushed gravel is a very simple and beautiful choice in landscape features and generally gives off a very professional look. Marble Chip Gravel Marble chips are usually white or whitish and have a very minimalist, simplistic aesthetic. They make an excellent accent in flower beds or gardens and even work well for small pathways. How to Choose the Best Gravel for Your Project Choosing the best gravel type for your landscape project might seem a bit daunting at first. How will you know what will best serve your landscape? If you are new to the landscaping world, we’d suggest that you reach out to a local landscaping company and speak with professionals about your project. Talking with a landscaping contractor will help you understand the different types of gravel in order to determine which would best suit your landscape project. If you have gravel questions or need help determining the best type of gravel for your outdoor project, contact New Life Rockeries to speak with one of our landscaping experts. What are the Different Uses for Types of Gravel? Gravel is an incredibly versatile material and the different uses for it are expansive. It can be used for aesthetic improvement, practicality, or as the foundation of a project. Here are some of the most common uses for different types of gravel. Drainage Enhancement Gravel and other types of crushed stone are often used at the base of flowerpots to promote drainage and prevent puddling. Gravel and crushed stone are ideal for drainage as it prevents soil erosion during damp, rainy seasons. Patio Foundation or Base Many patios utilize different types of gravel as a base. Gravel or crushed stone is often laid as a foundation before patio stones are laid on top. Gravel is also often used as the base of a retaining wall to surround the bottom layer of brick, and a professional retaining wall contractor can ensure it’s installed properly. Driveways & Pathways Want an easy, low-maintenance driveway or pathway? Just get a couple of wheelbarrows of gravel! Driveways are often tedious to design and maintain — so what’s stopping you from a simple gravel driveway? Gravel pathways throughout a landscape also add nice accents here and there and keep your grass from suffering from too much foot traffic. Filler Gravel is also very useful as a filler. Whether you need to fill gaps in a retaining wall or cracks in a patio, gravel will be your best friend. It’s simple, subtle, and blends well with any project. Need Landscaping Help? Need additional gravel tips? Or do you need help with a landscaping project that’s been on the back burner far too long? Whatever your landscaping needs, New Life Rockeries is here to help. We have a team of landscaping professionals who are ready to help you take your outdoor aesthetic to the next level. We help Washington homeowners create the landscape that they’ve always wanted. Our team of professionals will take your vision and turn it into a tangible reality so that you can’t wait to come home to your delightful outdoor landscape each day after work. Contact New Life Rockeries today to start working on your free quote. There’s no time like the present to get your landscape in tip-top shape.
Drystack Retaining Wall Tutorial
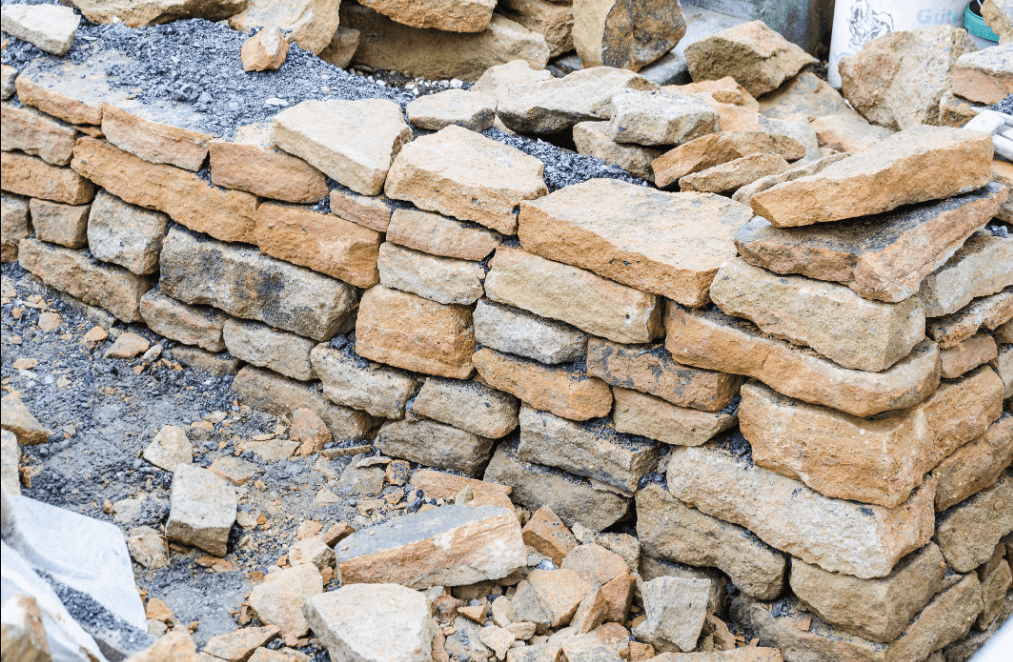
Many homeowners are finding that they have extra time on their hands this spring and want to use it to DIY a drystack retaining wall. If this is you, this article will give you a step by step tutorial for how to build a drystack retaining wall for your home. What is a Drystack Retaining Wall? Drystack retaining walls differ from others in that they are built without mortar to fill in the gaps. Stones are stacked on top of each other, creating a natural stone retaining wall that functions optimally for natural draining. How to DIY a Drystack Stone Retaining Wall Here is an easy, step by step tutorial for making a DIY drystack stone retaining wall. 1. Gather Essential Tools Some of the most useful tools for building a DIY drystack retaining wall include: Level String or twine Wooden stakes (for markers) Shovel Wheelbarrow Gloves 2. Measure & Calculate Measure the length and height of your drystack retaining wall so that you are able to calculate how much stone you will need to complete the project. Measuring and calculating are extremely important for ensuring that you get the correct amount of stone for your DIY drystack retaining wall. 3. Pick Your Material for Your Drystack Stone Retaining Wall Visit a rock quarry or stone yard and select the perfect stone for your drystack retaining wall. Choosing the best stone for your project largely depends on preference. Just make sure that you get enough flat stone to cap the top of your drystack retaining wall. 4. Make Your Outline Outline the area where you will build your drystone retaining wall. Using wooden stakes and string, build yourself a wall outline. 5. Dig Your Trench & Fill it With Gravel Take your shovel and dig a trench where you will be building your DIY drystack retaining wall. Your trench should be anywhere from six inches to a foot deep and a couple of inches wider than the base of your drystack retaining wall. Once you’ve dug your trench, fill it with gravel or dirt. 6. Lay the Foundation for Your Drystack Retaining Wall Carefully lay the first layer of stone making sure that they are level. This is the foundation of your drystack retaining wall and the most important layer. Place each remaining layer on top of the next, checking to ensure that each layer is level. If you have particularly large gaps between stone, fill them in with soil or crushed stone. 7. Cap the Top of Your Drystack Retaining Wall With Flat Stones Take the flat stones that you selected at the stone yard or quarry and use them to cap your drystack retaining wall. This is the last step in your DIY drystack retaining wall and once complete you can sit back and enjoy your work. Need Help With Your Drystack Retaining Wall? If you are looking for expert advice and help with building a drystack retaining wall, contact New Life Rockeries. We have a team of landscaping professionals who would be happy to build a beautiful drystack retaining wall contractors for your home. Contact New Life Rockeries today to start the process of improving your home’s landscape today.
How to Build a Retaining Wall With Railroad Ties: A Simple How To
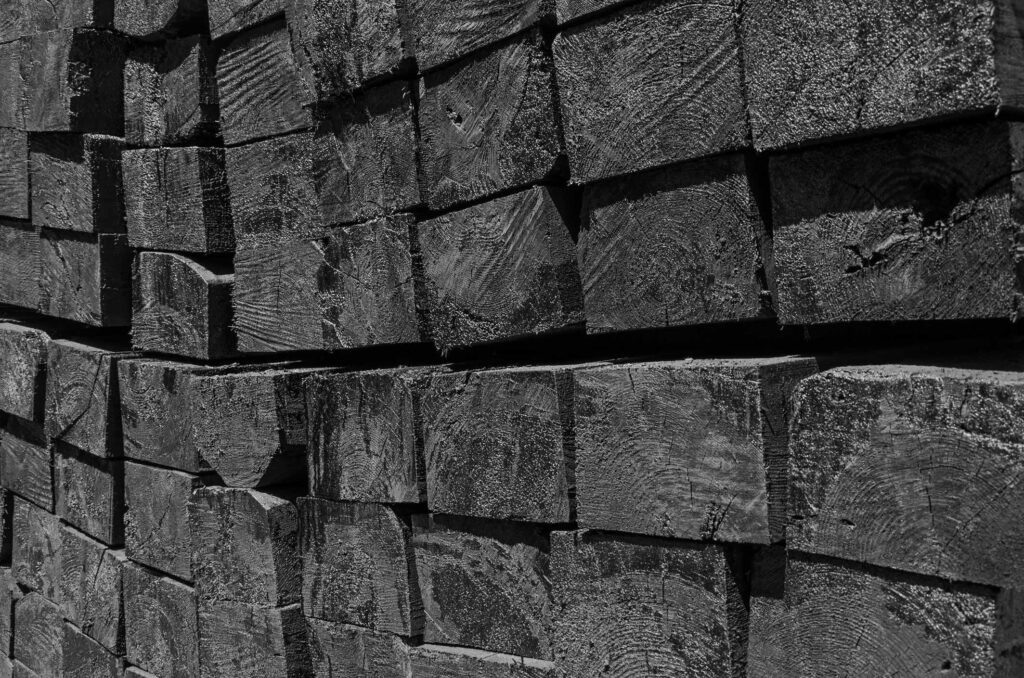
Outdoor landscaping is such a creative hobby. It lets you take items that you have access to, like railroad ties, wooden pallets, and more and gives you the chance to turn them into something that adds beauty to your yard. If you want to DIY a retaining wall built from railroad ties, this article will act as your guide to building a railroad tie retaining wall for your yard. Step 1: Level the Location First things first. Start building your diy railroad tie retaining wall by leveling and tamping the location site. A sturdy, hard foundation will ensure that there is a minimal amount of earth shifting after you’ve built your wall. Don’t be alarmed if your railroad tie retaining wall still shifts slightly as it settles, this is a perfectly normal occurrence and shouldn’t affect the functionality of your retaining wall. Step 2: Use Gravel for Water Absorption After you’ve leveled and tamped the foundation for your railroad tie retaining wall, it’s time to lay your gravel foundation. Using gravel is an excellent way to ensure that excess water is absorbed by running through the gravel instead of the possibility of it warping or shifting your retaining wall. Make sure that when you lay the first railroad tie you allow space around it to be filled in with gravel. This will secure your foundation and allow for optimal drainage. Step 3: Lay & Level the First Railroad Tie With your gravel foundation laid and tamped, it’s time to set the first railroad tie of your retaining wall. One of the most important parts about laying the first railroad tie is to ensure that it is as level as possible. This will ensure that the following ties that are laid on top are also level. Take your time with laying the first railroad tie and add or get rid of gravel as needed. The reason why it’s so important to have a level first tie is that all of the other retaining wall railroad ties will build off of the first one, meaning that if the first one is lopsided all proceeding ones will be as well. Step 4. Get Your Pins & Drill Pin Holes in the Railroad Ties Now it’s time to grab your pins. Many homeowners choose to use simple rebar as their pins as they work optimally for holding the railroad tie retaining wall steady and are easy to come by. Make sure that your rebar is all the correct height. Depending on the length of your retaining wall will determine how many pins you will need. Consider using a pin every two to two and a half feet to make a sturdy wall. Next you will need to drill holes for the pins. You should make the hole slightly larger than the pin itself (though not by much). Step 5. Place the Pins Now for the fun part, placing the pins. Most people will need a sledgehammer (a five or ten-pound sledgehammer should do the trick). Place the pin inside of the hole that you drilled and begin tapping it gently to ease it in. Once the pin is securely wedged in the hole you can start being a little more aggressive, using more force and a heavier sledgehammer. Make sure that you drive the pins into the ground so that your railroad tie retaining wall is firmly secured. Use your ten-pound sledgehammer to pound the pin to one side, securing the first railroad tie firmly to the ground. Step 6. Fill in the Gaps Once the first ties and pins are set, make sure that you fill in the gaps between the pins and the dirt with gravel. Put in a couple of inches of gravel at a time and securely tamp each shovel full of gravel down. Step 7. Rinse & Repeat From here on out the process is pretty simple. Place a one railroad tie on top of the last one, drill a hole, hammer your pin in, secure the pin, fill in behind the wall with gravel and tamp after each shovel full. Repeat these steps until your railroad tie retaining wall is the ideal height to serve its purpose. Hire a Professional Landscaping Service to Build Your Railroad Tie Retaining Wall Is it too daunted to take on the task of building a retaining wall with railroad ties? Never fear! You might not have the time to learn to build a railroad tie retaining wall on your own, but hiring a professional landscaping service can be done in no time. New Life Rockeries has been serving pacific northwest homeowners for many years and takes great pride in accomplishing the desired outdoor aesthetic of each homeowner. If you need help having a Seattle retaining wall contractors installed in your yard, give New Life Rockeries a call today. Our team would be happy to create a custom quote for your project and help you start on the road of improving your landscape.
5 Tips On How To Build A Rain Garden: A 2020 Guide
Washington is well known for being a rainy state. This means that delicate landscapes can become soggy, with excess rainwater puddling in every area that even remotely resembles a slope. For homeowners looking for a practical yet beautiful solution to Washington’s insistence on rain, a rain garden will suit your home and needs perfectly. This article details how to build a practical, aesthetically pleasing rain garden for your Washington landscape. What is a Rain Garden? Building a rain garden is like creating your yard’s own little ecosystem. You benefit from the rainfall and use it to feed your garden. Rain gardens are generally built near where homeowner’s roofs will let rainwater runoff and consist of a host of native deep-rooted plants. You can get as creative as Washington-native plants will allow you introducing color, texture, shape, and size into your rain garden. Why Does Your Landscape Need a Rain Garden? If you struggle with an excessive amount of rainwater throughout your landscape and are looking for a way to beautify your yard but you don’t want your landscape to be ruined with excess water, a rain garden is the best way to spruce up your landscape without the fear of Washington drizzle drowning your new additions. How to Build Your Own Rain Garden: 5 Tips If this is your first time building a rain garden, here are 5 tips to send you on your way to success and a beautiful Washington landscape. Use a Variety of Deep-Rooted Plants Deep-rooted plants thrive in damp environments, and thankfully Washington State is home to a variety of deep-rooted plants that are perfect for rain gardens. Consider deep-rooted plants like a bulrush, deer fern, Ribes (flowering currant), and watercress. Using a variety of deep-rooted, Washington native plants in your rain garden will ensure that there is a colorful mix of textures, heights, and shades throughout your rain garden. Use Rocks to Promote Drainage If you are unable to build your rain garden directly near a gutter, you can still use a rain garden to promote drainage throughout your landscape by utilizing rocks and creating channels in your yard. Begin the rock channel near where you are having drainage issues and run the rock channel through your yard, ending in your rain garden. Use the Right Soil Yes, you can actually use the wrong soil in your rain garden. The whole purpose of rain gardens is to absorb excess rainwater and prevent puddling throughout your landscape. This means that if you design your rain garden with less absorbent soil it will prevent the whole purpose of your rain garden. In general, an ideal soil mix for a rain garden includes around 30% sand, 30% organic material (usually from yard waste compost), and 40% loamy topsoil. Build Your Rain Garden Where it Can Be of the Most Use While you should build your rain garden at least five feet from your home, you should also make sure to position it in a spot where it will be of the most use. This means putting it in a place where water naturally collects. Your rain garden is meant to assist the rain in draining and serving a purpose (watering your garden). Placing your rain garden near gutters, sidewalks, or driveways will ensure its effectiveness and that it aids your landscape aesthetic and practicality. Hire a Professional Landscaping Contractor to Design Your Rain Garden If you want the benefits of having a rain garden installed at your home but are intimidated by the thought of designing and building the rain garden all on your own, consider hiring a professional landscaping company to help you get the job done. Here at New Life Rockeries, we have a dedicated team of landscaping experts who have been using their skills to improve the aesthetic and practicality of Washington landscapes for years. We would love to help you custom design the perfect rain garden to have built at your Washington residence. Work With New Life Rockeries Today To speak with our team of landscaping experts, give New Life Rockeries a call today. We take pleasure in helping homeowners achieve optimal landscapes for their homes that serve aesthetic as well as practical functions. Give New Life Rockeries a call today to start creating a custom-designed rain garden for your home.
How To Move Large Rocks and Boulders Without Getting Hurt

When it comes to DIY landscape projects, it’s important to understand how to complete a project both effectively and safely. Moving boulders or large rocks isn’t something that many homeowners consider getting help for. While it’s fine to move them on your own, it’s important to understand different techniques for moving boulders and rocks to avoid hurting oneself in the process. There are superior methods for moving boulders large rocks that will ensure that you don’t hurt your back while doing it. Here are 5 of the most effective methods for moving boulders and rocks to avoid injuring yourself. How to Move Large Rocks & Boulders: 5 Different Methods 1. Hoisting Method For this method of boulder moving, you will need a heavy-duty nylon cord or rope and a rachet crank. Start by securing the boulder or large rock with a cable, feeding the strap around an immovable object, and using the rachet to crank until the boulder has moved to where you want it to be. While this can be a slow method for moving large rocks and boulders, it is effective. This method can be done by a single person and will ensure that you do not strain your back while moving big rocks around your landscape. 2. Dragging Method For this second method, you will need a pry bar, a sturdy rope or nylon strap, and an old tire. Start by prying the rock loose using a metal bar or piece of wood (aka your pry bar). Once the boulder is loose, prepare your old tire. You should feed your nylon cord or rope through the tire and make a secure knot so that you are able to drag the tire with the boulder inside. Use your pry bar to turn your boulder on top of the tire so that the large rock is wedged comfortably in the center of the tire. Once your boulder is securely on the tire, it’s time to move. Securely grip the nylon or rope cord that is attached to the tire and keeping your back straight so as to avoid injuring yourself, start dragging the tire with the boulder to your desired spot. 3. Plank & Roller Method Tools that you will need for this method of moving a boulder or rock include several sturdy pipes (preferably at least four), and a strong plank to rest the boulder on. Start by placing the pipes at equally spaced distances from each other — close to where the boulder is that you’d like to move. Place the sturdy plank on top of the pipes and proceed to loosen the boulder from its current position using your hands or a pry bar. Roll, scoot, or lift the boulder on to the conveyor belt-like invention and proceed to carefully push the rollers and boulder to the new location. This may also be a slow process as you need to take care that the boulder doesn’t fall off of the plank. Roll the planks to your desired location and unload your boulder. 4. Use a Sled Winter sleds have more than one purpose in life . They can be used for fun during the winter and for yard maintenance during the summer. For this method of large rock removal, you will need a sturdy sled and a pry bar. Pry the boulder or rock loose and use your pry bar to hoist the boulder on to the sled (make sure that you cover the surface of your sled with a blanket first to avoid making scratches). Drag the sled to your desired location before unloading your boulder at its new home. 5. Use a Wheeled Trash Bin Another handy household item that can be used to move boulders or large rocks is a wheeled trash bin. Simply lay your trash bin on its side, use a pry bar to loosen the boulder, and roll the large rock into your bin. Take care that you carefully turn your trash bin upright as you don’t want the boulder inside to suddenly shift positions and damage your bin. Roll your trash bin to the spot where you’d like to boulder to be and carefully turn your bin on its side again and empty the contents. Also, feel free to refer to this video for more help: Need a Hand Moving Boulders on Your Property? New Life Rockeries Can Help! New Life Rockeries has been helping Washington State residents improve their outdoor aesthetics for years. If there is a boulder or large rock in your landscape that you would like to find a new home for or need help moving to another area of your property, we can help you. Contact our team of landscape professionals or call them today if you need help with any landscaping projects
How To Cut Flagstone With Methods That Actually Work (2020)

Are you getting your landscape all ready for this spring? Many PNW homeowners are starting to brainstorm ways to make their landscapes pop this year and have come up with a repertoire of ideas, many of which include flagstone or other yard rockeries. Flagstone is a gorgeous material that is comprised of quartz, silica, and feldspar. It comes in all shapes and sizes as well as thick and thin pieces and makes for an ideal stone in PNW landscapes. If you are preparing for your next home project and you want to implement flagstone into your landscape, this helpful guide will walk you through two methods for cutting flagstone that actually works. Even if you’ve never cut flagstone before, these safe and effective methods for cutting flagstone will help you get the job done. Before you dive into your project, ask yourself this question: Are You Cutting Your Flagstone into Regular or Irregular Shapes? Before you determine what method you will be using to cut your flagstone, you first need to ask yourself whether you are hoping to get a regular or irregular shaped, finished product. If you want to accomplish a smooth-edged, symmetrical piece of flagstone, you will need to use power tools to get there. But if varying shapes and edges are of no concern to you, your options for what method you use are more open. With that out of the way, let’s jump into these two effective methods for cutting thick or thin flagstone. 2 Methods to Cut Flagstone Method 1: Cut Flagstone by Hand If you are looking for a method that can be done without power tools, this is the one for you. Power tools can make people nervous if they aren’t familiar with working with them. Our advice to homeowners, don’t attempt to use power tools if you don’t feel comfortable operating them. For this method of cutting flagstone, you will need a hammer, chisel, and something for marking on the flagstone. Lay your flagstone on a flat surface where it will not move when you use the chisel. Use your marker to draw a line where you would like to make your cut (chalk works great for marking). Score the line by tapping the chisel and moving it along the line that you created. Continue back and forth, adding pressure and deepening the line. Pro tip: Take care that you don’t crack the flagstone by going too quickly with this method! Slow and steady gets the job done. This method of flagstone cutting works best on small projects that don’t require exact symmetry. If you just want to cut a flagstone to be used in a path in your yard or garden, this method is ideal. Safety tip: make sure that you wear goggles and gloves when cutting flagstone by hand! Method 2: Cut Thick Flagstones Using a Circular Saw This method is ideal for small projects that require more symmetrical or precise cuts. Whether that be building a fireplace hearth or a small flagstone patio, using a circular saw to cut flagstone will help you accomplish a uniform look. Here’s how you can cut flagstone using a circular saw: Secure your flagstone (for safety reasons while you are operating a power tool, it’s important that your flagstone is firmly secured). Measure and mark your flagstone Use your circular saw to cut along the line that you’ve drawn DO NOT apply pressure! Simply allow the weight of the circular saw to score the flagstone, making sure that you don’t push the saw down but gently let the blade glide through the stone. Once the flagstone has been sufficiently scored, you can switch to the hammer and chisel method. Continue with the hammer and chisel until you have completed the cut Safety tip: always use protective eyewear and gloves to ensure that splintering flagstone doesn’t injure you. Need Help With Your Flagstone Project? Give New Life Rockeries a Call! Not ready to take on the challenge of cutting flagstone just yet? That’s okay! New Life Rockeries has you covered. We have a team of landscape contractor professionals who have experience using power tools and making accurate flagstone cuts. Simple or complex projects are what we thrive on. We love helping Washington homeowners beautify their landscapes and get their outdoor aesthetic ready for spring. If you have a flagstone project in mind that you need some help with, give New Life Rockeries a call. Our team of landscaping experts would be happy to install a flagstone path or patio in your landscape for you. Don’t spend any more time stressing about how you are going to DIY this project, contact or call us to get started today.
Before Building a Retaining Wall Drainage, Know These Tips
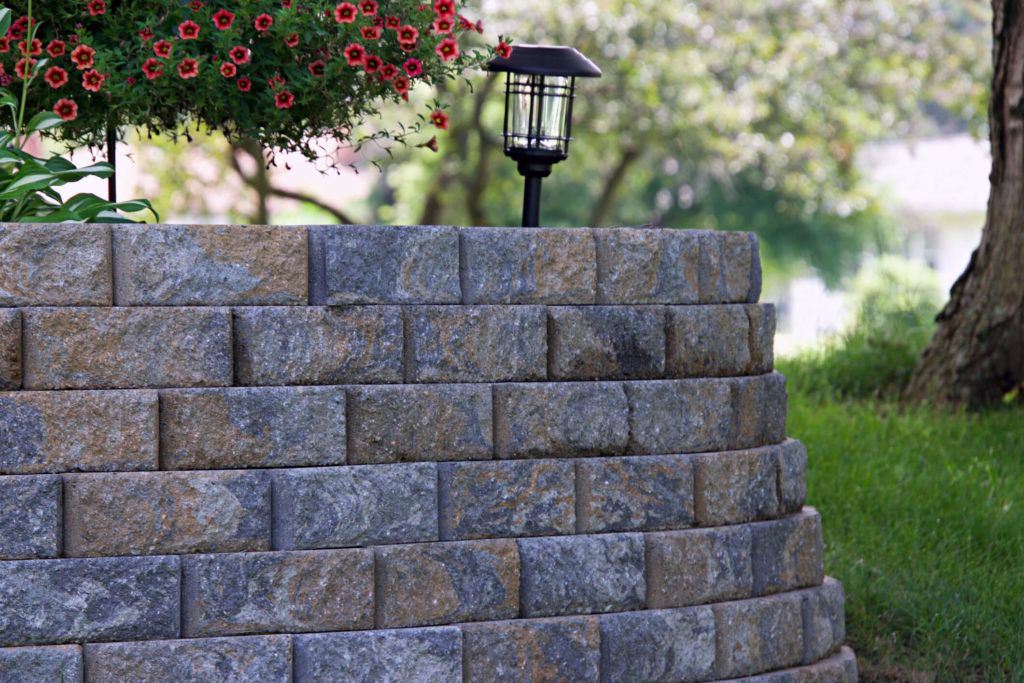
Poor drainage in a landscape can cause all kinds of functional and aesthetic issues. If you have puddles forming throughout your yard or issues whenever it rains (which happens quite often in Washington), you have a drainage issue. Drainage issues in a yard can cause problems for the foundation of your house and ruin your lawn with sogginess. If you are struggling with drainage issues that you want to fix immediately, consider having a retaining wall installed to promote drainage. A retaining wall in your yard can make all the difference in the world when it comes to adequate drainage. Why Do We Need Retaining Walls? Retaining walls act as barriers to prevent soil or water from seeping into our yards and mottling our landscapes. They can act as aesthetic pieces in our landscapes while also serving a practical function. Homeowners who have soil that continuously spills over into their yards or water that drains onto their lawn need to have a retaining wall installed. If you think that your yard might need a retaining wall to promote drainage, give our team of landscaping experts a call. At New Life Rockeries, we have a team of landscape and retaining wall contractors expert who would be happy to give you an estimate tailored to the needs of your landscape. If you want one of our team members to come out and take a look at your lawn to see whether a drainage retaining wall would be beneficial for you, give us a call today. Why Do Retaining Walls Fail? Retaining walls that aren’t built using high-quality materials or ones that are built hastily often fail. Installation and the quality of materials used to build retaining walls matters greatly. You need a landscaping company that you trust working on your retaining wall. Tips For Building A Retaining Wall For Drainage There are measures that you can take to prevent your drainage wall from failing. If you need a retaining wall built in your yard for drainage, you should consider having a professional landscaping company install it for you. A professional landscaping service will make sure that your retaining wall is installed with the right products that will promote drainage in your yard. Here are some tips for building a retaining wall for drainage. 1. Use Gravel & Soil Use gravel to support the foundation of your retaining wall and soil to promote drainage. The soil that you use will absorb and hold water while the gravel or small stones promote a sturdy foundation for your retaining wall. 2. Use Drain Pipes Once you have your retaining wall installed, the project is far from over. You cannot simply have a retaining wall installed and expect all your drainage issues to be solved. Sure, the retaining wall will prevent water from seeping into your yard, but now you have the issue of having water puddling up behind your retaining wall. This is where drainage pipes come in. You need a system in place to drain the water from behind your retaining wall so that the foundation of your retaining wall doesn’t suffer damage. Drainage pipes will solve the issue and carry excess water to a proper draining site that won’t cause harm to your yard. 3. Use The Right Stones If you use stones and rocks that are too light for your retaining wall, they will not make a sturdy retaining wall which in turn will fail to promote drainage. To build the most effective retaining wall for drainage you should use stones that are heavy enough to comprise a sturdy wall and prevent water from draining into your yard. If you need help choosing the right stones for your drainage retaining wall, give New Life Rockeries a call today. Our team of professional landscapers has plenty of experience building sturdy retaining walls to promote drainage. We also have connections with local suppliers and know where to find affordable and high-quality stones to build the perfect retaining wall. Work With Retaining Wall Experts Today Here at New Life Rockeries, we have a team of retaining wall experts. We have been building retaining walls for Washington homeowners for years and so have had time to perfect the craft. We understand the importance of building a sturdy retaining wall that promotes good drainage and we know the consequences that come from having poor drainage. Here in Washington, it is essential to have good drainage systems in place since we see nearly 40 inches of rainfall each year. Let us help you optimize your landscape for wet weather. If you would like to start optimizing your landscape today by having a retaining wall installed, give New Life Rockeries a call. We will give you our professional, honest opinion and try to help you find the best solution for your drainage issue.
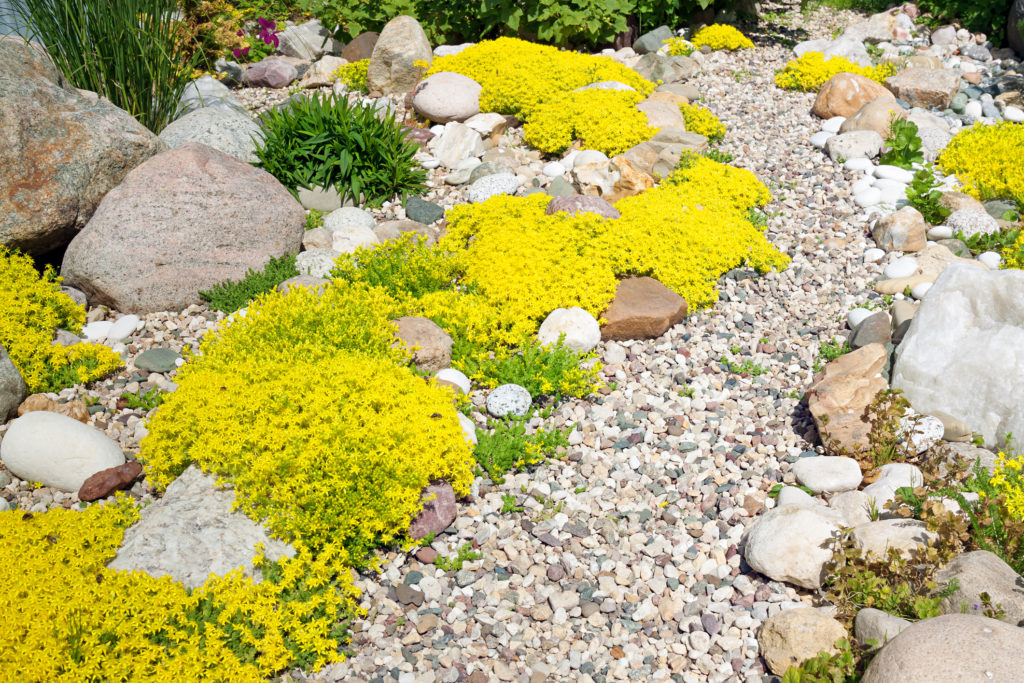
The Beginners Guide to Building A Rock Garden On A Slope

Building a rock garden on a slope requires a special set of skills. While building a rock garden might be a DIY task for some, building a rock garden on a slope definitely requires some landscaping help. While many homeowners might feel some level of despair when surveying their sloped yard, we are here to let you know that a sloped yard can lead to an incredibly beautiful landscape. A Sloped Yard Is The Perfect Place For A Rock Garden. Having a slight hill in your yard gives you so many creative options for building a rock garden on a slope or other sloped landscape designs. So rather than viewing your sloped yard as a negative, think of it as a chance to exercise your creativity! Here are some tips for how to build a rock garden on a slope. 1. Get The Right Tools It takes the right tools to build a rock garden on a sloped yard. Go to your local yard care store and buy a good shovel, spade, and some gardening gloves. Having the right tools is the first step to building a gorgeous rock garden on your sloped yard. 2. Use Plants That Thrive In Rocky Conditions This is so important! You cannot simply throw a few pretty plants into your hillside rock garden and call it a day. When choosing plants and shrubbery go on your sloped rock garden, you need to carefully choose plants that will do well in rocky conditions. Add some shrubs for variety, a small tree here and there for texture. If you want to add even more variety, throw in a colorful perennial or two. Adding perennials is a good way to add both texture and a pop of color to your hillside rock garden. If you’re unsure about which plants to use in your sloped rock garden, give New Life Rockeries a call. Our team of landscaping experts would be more than happy to guide you through the plant selecting process. 3. Make Your Rock Garden Easy To Maintain Easy maintenance is a must. Most homeowners are very busy and don’t have time to maintain a tropical garden — that’s why they are looking into getting a rock garden to begin with. Make sure that the plants you choose for your rock garden are easy to maintain and don’t require excessive watering or pruning. Rock gardens are meant to be gorgeous, low-maintenance additions to your sloped yard. Make your rock garden in your sloped yard simple and easy to maintain. 4. Pick The Right Rocks The best rocks for building your rock garden depend on your preferences and the aesthetic you are going for. Consider adding different sized and shaped rocks in your hillside rock garden for variety. Add in a boulder here and there while you are building your rock garden. Don’t hesitate to get creative and to try new things. Observe your work and be willing to change anything that doesn’t suit you. Your slope rock garden is for you and should suit your liking first and foremost. Add a stepping stone pathway up the slope, this will give your hillside rock garden so much character. What To Do If You Don’t Know Which Rocks To Choose If you need help choosing rocks that will help you accomplish a specific aesthetic, don’t hesitate to reach out to New Life Rockeries today. Our team of skilled landscapers has been helping pacific northwestern homeowners nail down on their preferred aesthetic for many years. We enjoy helping homeowners who don’t know what to do with their sloped yard find the right solution for them. Give our landscaping experts a call today to get started building the Seattle rock garden of your dreams. 5. Work With A Professional Landscaping Service Our next tip when it comes to building a rock garden in your sloped yard is to work with a professional landscaping service. Having a rock garden built in a sloped yard is not always straightforward or easy. It requires a level of landscaping knowledge that many homeowners are unaware of. If you would like to get started building your rock garden on a slope or you want to have a team of professional landscapers come out and look at your sloped yard, give our team a call today. Here at New Life Rockeries, we are passionate about helping homeowners accomplish their vision for their home and yard. We understand the complications that a sloped yard brings and know the perfect designs to accentuate any yard. We can bring your outdoor aesthetic to life through our services and want to help you feel good about your home. To get started building the perfect rock garden for your sloped yard, give New Life Rockeries a call today.
Guide: Enhance Your Curb Appeal in 2019

Why Is Curb Appeal So Important In 2019? Whether you plan on listing your home soon or just want a new look, improving your curb appeal will increase the value of your home. By improving the curb appeal of your home, the value of your property will rise. After all, the exterior of your home is the first thing that people see when they arrive and gives the first impression of your house. This is why improving your curb appeal is critical if you’re planning to sell your house. One of the quickest ways to make potential buyers fall in love with your home is by improving your landscape design, painting the house, or updating external home features. How To Improve Curb Appeal Now that you understand why it’s important let’s discuss how to improve your curb appeal. 1. Clean Up Seasonal Debris The first and most basic step to improving your curb appeal is to clean up seasonal debris. Hire a landscaping crew to come out and clean up fallen leaves and blow tree debris from your driveway. This type of clean up work won’t take a skilled crew that long but will improve your curb appeal exponentially. 2. Presentation Is Key People spare no effort when it comes to gift presentation (e.g., nicely wrapped Christmas gifts), why would you be lax in how your home is presented? Curb appeal is a form of presentation. It determines how your home is perceived by others. The front of your home is the first thing that people see when they arrive at your home. If you want to create a good first impression, you need to improve your curb appeal. One trick is to place design elements leading up to your house — features that present the house as the main focus and guide eyes to your front porch. When done correctly, presenting your house this way will make it irresistible to buyers. 3. Emphasize Clean Lines People love symmetry. Take advantage of this by creating aesthetically-pleasing lines that guide the eyes to your house. You can also have a landscape contractor crew do some edging to define edges and create contrast throughout your yard. Add bushes, shrubs, or grassy areas that emphasize lines and symmetry. This is a cheap way to spruce up the front of your house and add curb appeal without too much cost to yourself. 4. Add A Stone Water Feature Studies have found that including a stone water feature in your front yard will help your curb appeal skyrocket. The good news is, water feature installation is both quick and convenient! If you’d like to take advantage of this curb appeal tip, contact New Life Rockeries to speak with a landscaping professional about having a water feature installed. 5. Add A Stone Rockery There are countless stone rockery ideas online to help homeowners increase their curb appeal. A front yard rockery can even serve a double purpose if you need a barrier to stop soil erosion or are thinking about having a retaining wall installed. Stone rockeries are classic landscaping additions that improve the aesthetics of your lawn and enhance curb appeal. 6. Add Trim To The Exterior Of Your Home Another quick and easy way to improve the curb appeal of your home is through sprucing up the exterior of your house. One way to do this is by adding new trim to your home. Outdoor trim is both timeless and elegant. If you are looking to list your house soon, it’s important to choose a quality trim that will last and maintain its color for a long time. 7. Install Outdoor Lighting Our seventh curb appeal tip is to install outdoor lighting. Lighted walkways are classy and are a way to liven up your front yard landscape instantly. If you love a minimalistic style, outdoor lighting is one of the surest ways to make a gorgeous landscape without much work or even expense. 8. Add A Stone Walkway A stone walkway makes for a gorgeous addition to any front yard landscape. A stone walkway could go with any of the above-mentioned curb appeal landscaping ideas easily. It is one of the most subtle ways to add curb appeal and centralize your home as the focal point in your landscape. Work With A Reliable Landscaping Team Today Looking for quick and easy ways to add to your curb appeal? Contact New Life Rockeries to speak with a landscaping professional about your project today. Our crew of skilled landscapers has spent decades helping Pacific Northwest homeowners improve their yards. We’d love to help you with your project! Give us a call and start improving your home’s curb appeal today.
8-Tips for Fall Lawn Care
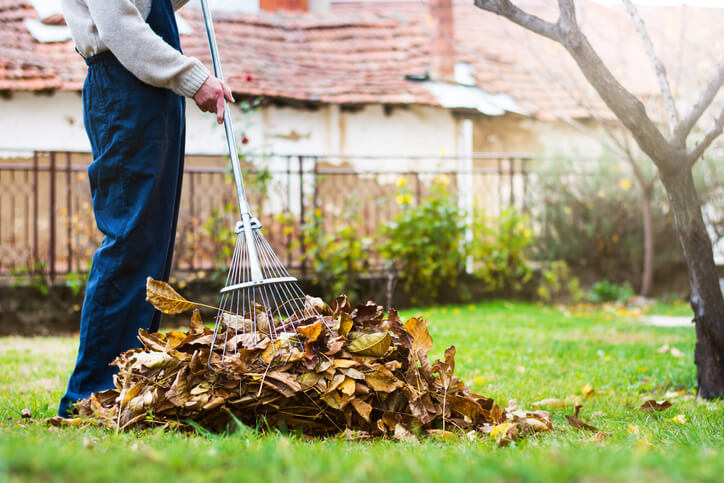
It’s that time of year again. Frost is in the air and homeowners are at a loss, yet again, for how they should maintain their yard during the fall. If this describes your situation — buckle up! You’ve come to the right place. To help you keep your lawn in pristine condition through this breezy season, the team here at New Life Rockeries has thrown together our 8 favorite fall lawn maintenance tips. Taking adequate care to maintain your lawn during the fall will ensure that your lawn is healthy, thick, and lush when springtime rolls around. Here are 8 tips for lawn care and maintenance this fall, from professional landscapers. 1. Take Care Of Dead Leaves & Grass This fall lawn maintenance tip will ensure that you have a healthy lawn throughout the winter and on into the springtime. Leaving dead leaves and grass in place will smother the lawn underneath and prevent essential sunlight from reaching it. Take the time to carefully rake and dispose of all dead leaves and replace dead grass. 2. Have Your Irrigation Systems Winterized An essential fall lawn maintenance tip is to have your irrigation systems winterized. Leaving irrigation pipes with water in them all winter long could result in expensive repairs in the future. This is a fall lawn maintenance tip that should involve the help of a landscaping professional. As autumn is in full swing in the Pacific Northwest, you should schedule a crew to come to winterize your irrigation immediately. 3. Check & Clean Gutters Now we come to the dreaded one — checking and maintaining the gutters. During fall, it is very common for leaves and debris from surrounding trees to clog up gutters. Since this could cause maintenance issues for your house as well as your lawn, you should pull out your handy ladder and check your gutters as part of your fall lawn maintenance this season. 4. Clean & Organize Your Lawn Maintenance Shed This fall maintenance tip will help you so much in the springtime when you prepare to spruce up your home for the year. Take an afternoon to put all your lawn maintenance tools back in place, clean them, and make sure they are all organized for the following year. 5. Decorate Your Lawn For The Holidays Our favorite fall lawn maintenance tip — prepare your lawn for the holiday season by decorating! After you’ve adequately cared for your lawn and prepared it for winter and fall, spend an afternoon with your family to decorate your lawn for the upcoming holidays. String the house with lights and add fun lawn decor to your yard in anticipation of the holidays. 6. Keep Up With Lawn Pest Control Homeowners often mistakenly think that they don’t need to keep up with lawn pest control during the fall and winter months. This, however, is not the case. Insects and pests might just be getting cozy in your lawn now, but when springtime rolls around they are going to wreak havoc on the health of your lawn. Make sure that you address any pest problems before winter is in full force and care for your lawn by getting rid of unwanted insects. 7. Feed & Water Your Lawn When Needed Just because it’s fall doesn’t mean that you can ignore feeding and watering your lawn. On occasion, you may still need to water your lawn — despite living in Washington State. Keep track of how often it rains and maintain your yard this fall through watering and fertilizing when needed. Additionally, don’t forget to fertilize your lawn during the fall months. It’s especially important to use a fertilizer that is rich in nitrogen during the fall. This type of fertilizer will nourish your lawn throughout the fall and winter months and is one of the best ways that you can care for your lawn this autumn. 8. Continue Cutting Your Lawn We’re not just talking mowing your lawn throughout the fall and winter whenever you get the urge. You should be routinely mowing your lawn and cutting it to the correct height. Until you’ve had the first frost, your grass will continue growing and you should continue caring for it by mowing it one schedule to encourage optimal health and growth. Talk With Fall Maintenance Experts Today Need some help caring for your lawn this fall? You’ve come to the right place! Our expert team of landscape contractor at New Life Rockeries has the skills needed to help you maintain your lawn this fall. We have been helping homeowners in the Pacific Northwest to care for and maintain their lawns throughout the fall and winter months and want to help you as well. If you have any concerns or questions about fall lawn care or want to schedule our team to come out and winterize your irrigation systems, give New Life Rockeries a call today or contact us here.