How To Build A Sitting Wall For Your Patio
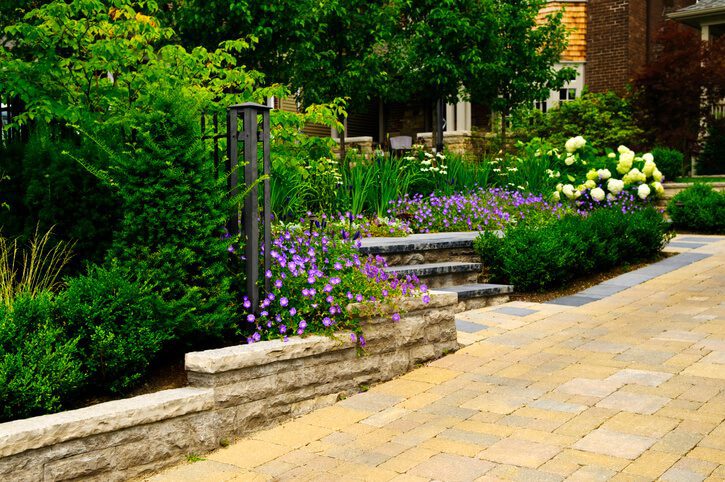
Is your patio missing something? Are you looking for ways to spruce up your patio while also adding to the convenience of your outdoor space? If so, there are a couple of different ways to do that, our favorite being building a sitting wall. Sitting walls are wonderful additions to back patios because they are aesthetically pleasing, simple, low maintenance, and a good patio contractor can install them to add to the convenience of your patio. If you are planning on building a sitting wall on your patio, here are 7 easy steps to follow to get your project on the road. How To Build A Sitting Wall 7 Steps 1. Make a Timeline How much time are you planning on dedicating to building your patio sitting wall? Your project timeline will determine things like cost, materials, and design to some extent, so you should first focus on figuring out how much time you have to invest in building your patio wall. If you have a vision for the sitting wall but are unsure if you have the time to spare to build it, consider talking with an outdoor landscaper. Maybe you don’t have the time to build the wall yourself, but you have the option of working with a professional landscape contractor. If you would like to complete the project yourself but want a professional opinion from a local landscaper, contact New Life Rockeries today to speak with a landscaping expert. 2. Find the Perfect Location Where would you like your sitting wall to be? One of the best locations for sitting walls is on the patio, as it is a location where people congregate during the spring and summer months. Spend an afternoon marking out where you would like your sitting wall to be on your back patio to get a rough idea of the size and dimensions of your wall. Pro-tip, consider building the sitting wall in an area of your patio that is covered as Washington State is notorious for having drizzly weather. 3. Get the Right Materials Do you want a stone or brick sitting wall? Finding the right materials for your patio sitting wall will serve to help you achieve your desired aesthetic. Look up patio sitting wall designs and find a few styles that you like. Find similar materials for building your own patio sitting wall. If you are unsure where to look to find certain materials, consider contacting a professional landscaping service as they are familiar with material providers in the region. 4. Lay the Foundation Now comes the fun part, starting your project. Laying the foundation for your stone patio sitting wall will determine the sturdiness and levelness of your wall. This is an important step, and if you’re unsure whether or not you can successfully pull off laying the foundation, consider calling a professional landscaping service to help you out. Foundation laying tools such as a level are essential during the foundation laying process in order to create a beautiful, symmetrical sitting wall. 5. Build Your Sitting Wall Once the foundation has been securely laid, continue building your patio sitting wall one course at a time. After each new course is laid, take a step back, and survey your work. Make sure that your sitting wall is symmetrical and level. If you are not careful to ensure that your wall is level after every course is laid, you will end up layering the problem, which will result in an unsatisfactory end result. 6. Fill in the Gaps Make sure that all gaps are adequately filled in using a material that is long-lasting and suiting to your wall. Gaping crevices between course layers is unappealing and does not look aesthetically pleasing on your patio. Materials that are commonly used to fill in sitting wall gaps are sand or other fine materials. 7. Polish it up Add your finishing touches! Clean up the patio and around your wall. Wash your wall down as it may have become dirty during the building process. Add a few other patio accents to complement your sitting wall. You might want to consider adding a low table to accompany your sitting wall or a little area rug to cozy up space. Adding the finishing touches to your outdoor patio will complete your home and make your outdoor space comfortable for your family and visitors. Talk With Patio Wall Building Experts If you would like to have a patio wall built but don’t have the time or know-how to complete the job, why not hire a professional landscaping service? New Life Rockeries is proud to offer professional landscaping services to residents in Seattle and the surrounding areas. We want to help homeowners accomplish their outdoor aesthetic goals through our services. If you have questions about having a sitting wall installed on your patio, contact New Life Rockeries to receive a professional quote about the timeline and costs of your project.
9 Stone Walkway Ideas To Improve Appearance And Functionality
Did you know, having a stone walkway in your landscape might actually increase the value of your home? That’s right, landscaping your home is not just for aesthetic purposes, it can also be used to improve functionality and increase home value. At New Life Rockeries, we know that there are countless ways to have a stone walkway installed in your yard all of which look fabulous, and improve the appearance of your landscape. If you are toying with the idea of having an outdoor pathway put in your yard, here are 7 stone walkway ideas to improve not only the appearance but also the functionality of your landscape. 1. Use Local Stones In Your Walkway Buying from a local quarry is an excellent way to support your local economy. It also means that your outdoor pathway is entirely unique. Rocks and stones that are supplied by a local quarry are better able to match your outdoor natural aesthetic. These elements are natural to your environment and so fit into your landscape without a problem. 2. Create A Walkway That Improves Functionality Is there an area of your yard that you or your pets walk over commonly? Would you like there to be a stone walkway or stepping stones giving you a straight shot across your yard? Having a stone pathway or stepping stone path through your yard organizes your yard and gives you easy access through your yard. An outdoor path is a good way to improve the functionality of your landscape with minimal work and expense. 3. Use Plants To Complement Your Stone Walkway Using plants to compliment your stone walkway gives your pathway a completed look and majorly improves your aesthetic. Plants do a lot to increase the aesthetic of your landscape and can also improve functionality as they assist with drainage. Use regional plants to compliment your local quarried stone walkway. 4. Use A Border Adding plants or other elements to create a border around your outdoor pathway is an excellent idea to give your landscape a completed look. Borders lend a very organized feel to a stone walkway and are the surest way to keep people from walking on the lawn. 5. Do A Stepping Stone Walkway Stepping stone walkways are a classic outdoor pathway idea and a favorite among homeowners. If you enjoy a free, natural aesthetic that isn’t confined, a stepping stone walkway would be perfect for your yard. Several stepping stone walkway ideas are placing stepping stones in dirt, bark, or grass. If you have free landscape with an emphasis on a more natural aesthetic, a stepping stone walkway will fit into your landscape nicely. 6. Create A Lighted Walkway Light can make or break a mood. Adding lights alongside your walkway can be a great aesthetic decision for your entire landscape. Creating a lighted walkway is a good way to give your stepping stone walkway a clean border and illuminate your outdoor pathway by night. Lighted pathways are a creative decision and are simple while still incredibly aesthetically pleasing. Having a lighted pathway gives landscapes a formal and elegant design. 7. Add A Retaining Wall Alongside Your Stone Walkway Retaining walls are also a wonderful addition to your yard. They go along really well with stone walkways and can complete your landscape. You don’t need a big retaining wall if its main purpose is aesthetic. You could have a small retaining wall installed to border or complement your outdoor pathway. 8. Put A Stone Walkway Next To A Water Feature Having a peaceful outdoor pathway running alongside your water feature will give your landscape a sense of serenity. Stone or rock water features make an excellent addition to your outdoor appearance and go wonderfully well-accompanying stone walkways. 9. Put A Stone Pathway Through Your Garden Whether you have a flower or vegetable garden, having a stone walkway through it is a simple and inexpensive way to spruce up the entire area. A stepping stone pathway would be excellent for a flower garden while a more organized walkway would be good for a vegetable garden. Outdoor stone walkways can be built in a number of different ways and make an excellent addition to any garden. Have A Stone Walkway Installed In Your Yard Today! If you’ve decided to make an aesthetic change to your landscape by adding a stone walkway to your yard, contact New Life Rockeries today to speak with one of our expert team members. We’d be more than happy to give you a custom quote for your stone walkway project. It is our goal to help Washington homeowners improve their outdoor appearance and functionality through our custom pathways and stone rockeries. To speak with one of our landscaping contractor experts, give us a call or contact us today.
Great Landscaping Ideas for Water Drainage

At New Life Rockeries, we know lawn drainage is an important part of the functionality of your yard. Washington State sees an average of almost 40 inches of rain per year. This large number can result in a soggy lawn if you don’t have the proper backyard drainage. To avoid letting your beautiful lawn turn into a swamp, there are several landscaping hacks that you can use in your outdoor design. Landscaping is generally thought of as purely aesthetic. However, this doesn’t have to be the case! Your landscape can also be used for convenience and functionality while still beautifying your yard. Adequate drainage is such a vital part of the functionality of your home. Good lawn drainage throughout your landscape will divert rainwater, preventing your yard from becoming soggy. Before we get into landscaping options for diverting water accumulation, let’s first look into what causes poor lawn drainage. What Causes Poor Outdoor Drainage? Water takes a long time to be absorbed into soil. Because of this, you might suffer from poor yard drainage in your backyard. If you have clay or other close particle soil, you likely need to install a drainage system to avoid waterlogging your backyard. Soils like these aren’t good with lots of water and become waterlogged if neglected. Other factors also contribute to poor drainage. Things like the incline of your yard and the efficiency of your already existing drainage systems play their part too. Regardless of why you have a backyard drainage problem, here are a couple of good reasons why you should have it fixed right away. Why Is Outdoor Drainage So Important? Good landscaping that diverts water buildup, is vital in maintaining not only your yard but also your house. Poor backyard drainage will result in damage to your yard and possibly even your house. Neglecting to divert water from your backyard landscape can present a number of serious problems that cost a lot of money to remedy. To avoid lawn damage due to drainage issues, contact a landscaping professional as soon as you notice the problem. Water can damage your yard and home in more than a few ways, so it is a good idea to have the problem fixed as soon as you notice it. Landscaping For Water Drainage 4 Ideas There are more than a few ways to creatively adding proper drainage throughout your backyard. If you want to have your yard landscaped for drainage, there are more solutions than simply adding a grate drain. Below are just a couple of examples of landscaping for drainage and how it can be both effective and beautiful. Create a rain garden Rain gardens — as the name suggests, are gardens designed with rainfall and backyard drainage in mind. The number of designs is limitless when it comes to designing a rain garden. Most rain gardens utilize native plants that thrive in wet conditions. These plants, rocks, and other rain garden elements serve to absorb excess rainfall to prevent your lawn from becoming soggy. Create a rock river Rock rivers also come in various designs and materials. These beautiful, dry river beds are a creative way to landscape your yard for drainage. Having a rock river through your backyard is the perfect way to divert water from your landscape and prevent future drainage issues. Use absorbent elements throughout your landscape Using absorbent plants, rocks, and mulch throughout your backyard landscape will work wonders. Elements like these help prevent lawn drainage issues by naturally absorbing rainfall. Having a yard that is prone to water build-up and drainage issues means that you need to design your landscape accordingly. Use pavers to encourage water drainage Include pavers that have small gaps to allow for water drainage is also an excellent way to divert water from your backyard landscape. Small gap pavers can look extremely aesthetic in a backyard landscape and are a subtle way to prepare your lawn for adequate drainage. Do some looking online to get an idea of what kind of pavers you’d like to have in your yard and what’s available to you. Hire A Professional Landscape Drainage Expert Here at New Life Rockeries, we employ only the most skilled landscaping experts for our team. It is our vision to help homeowners in Washington State achieve the outdoor aesthetic of their dreams. We want to help you make your backyard both beautiful and functional. We understand that many homeowners in the PNW suffer from water drainage issues in their landscape due to heavy rainfall. We want to meet your landscaping needs and help you find the best backyard drainage landscape for your home. Contact our team of landscaping experts today or fill out our quote form if you’d like to receive a custom quote for your landscaping needs. Our landscaping contractor professionals want to help you get the yard of your dreams so give us a call today or contact us to find out about the services that we offer and how we can help you with your lawn drainage issue.
7 Home Courtyard Ideas for an Elegant Outdoor Area
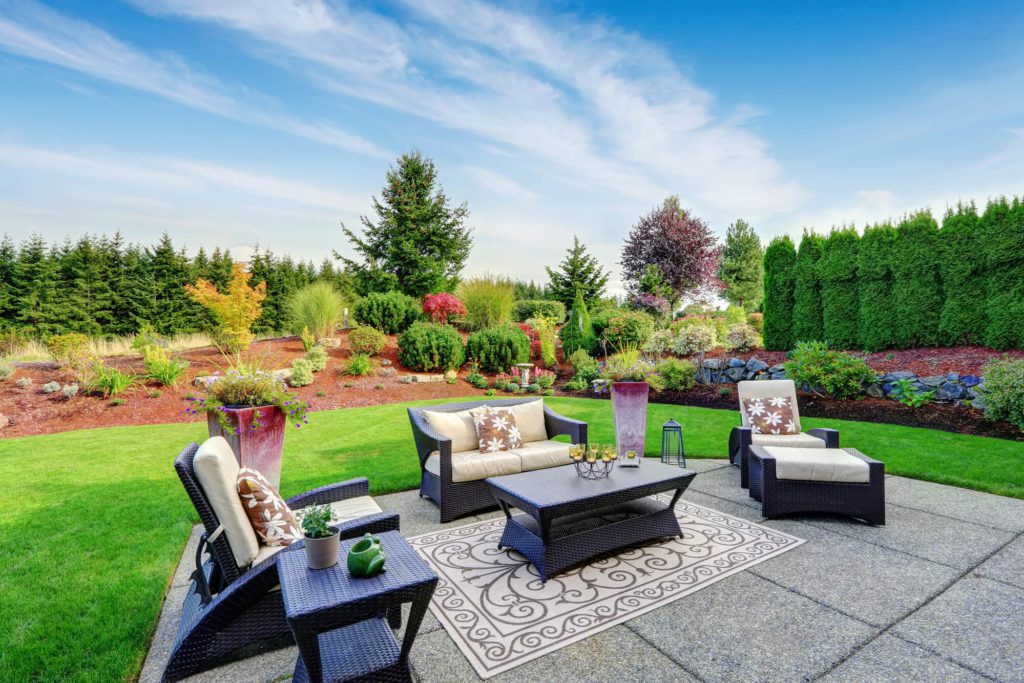
Home courtyards are often found in the backyard of homes and are the finishing touch of most homeowner’s outdoor aesthetics. They are typically enclosed on 3-4 sides and are uncovered outdoor areas. At New Life Rockeries, we know exactly how to make your own backyard courtyard into something special to impress your guests. Courtyards often have a sitting area and are used for hosting or dining during the summer months. If you would like to design a courtyard for your home and are in search of ideas for your courtyard, this article is for you. Whether you are looking for stone, modern, or traditional courtyard ideas, here are 7 creative backyard courtyard ideas to fuel your motivation! 1. Urban Backyard Courtyard Urban backyard courtyards have a very uniform and city look to them. They are maintained, organized, and have a few intentional and unique elements. They generally take on the form of a more modern courtyard with muted gray flagstone and grass as main features. Elements Use courtyard furniture that is primarily black or has many black accents. Go sparingly on flowers and instead choose leafy trees and moss for your courtyard garden. Consider adding wooden planter boxes and retro drop lights to finish off your urban courtyard aesthetic. 2. Natural Stone Courtyard Ideas A much more natural courtyard design, this one uses stone and rock as the main design element and focuses on creating a wild aesthetic. Implement lots of grays, browns, greens, and earthy shades into this backyard courtyard design. Elements Utilize differently shaped stones, this will add a natural and wild feel to your courtyard. A wonderful feature of a stone courtyard could be a small stone water fountain in the center of your courtyard. Opt for burnt and muted colored shrubbery and flowers as these will best accent your stone courtyard. 3. Mediterranean Backyard Courtyard This is a fun and creative backyard courtyard concept for you. Are you in love with Mediterranean vibes and design? If so, you will be glad to hear that you don’t need to go to Greece for a taste of some Meditteranean style. You can bring the Meditteranean to your backyard by creating a Meditteranean inspired courtyard! Elements Have a Meditteranean patio installed as the main feature in your themed courtyard. Use Greek-inspired accents such as statues, a Grecian fountain, and larger patio furniture. 4. English Courtyard Ideas If you love well maintained, pristine outdoor aesthetics, an English courtyard design will suit you. English courtyards feature a well-groomed and organized approach to backyard styling. Elements Hedges, roses, symmetrical patios, and delicate furniture are all elements of an English backyard courtyard. Consider adding a courtyard garden as the focal point in your backyard design. 5. Cottage Garden Backyard Courtyard Cottage gardens are those where a variety of plants, veggies, and flowers are grown together in a wild and random combination. This courtyard idea is a good design for homeowners who don’t have time to spend maintaining their backyard. Since cottage garden courtyards have a wild aesthetic, they don’t require lots of maintenance. Elements Lots of plants and shrubbery. You can include veggies, flowers of various colors, shrubs, and trees in your cottage garden to your heart’s content. A cottage garden is your chance to let loose and plant whatever makes you happy. 6. Private Courtyard Ideas Private courtyards are nice for city homeowners who have neighbors in close proximity. Living in the city can make you feel like you lack privacy and that you can’t get away from people. Creating a private courtyard will give you an escape into nature and makes an excellent hosting space. Elements In order to create a private courtyard, you will need elements that add to the seclusion. Tall trees, wooden slat-fence, retaining wall, and shrubbery are all wonderful seclusion elements. Have a decorative fence or wall installed and allow ivy to grow over it to add the secluded effect. Plant tall trees to further enclose your courtyard. Having tall elements planted or installed on all sides will add to the seclusion and will make you feel like you have a private haven in your backyard. 7. Traditional Backyard Courtyard Traditional backyard courtyard designs feature cozy elements, simply patios, and comfy furniture. There is a sense of uniform in traditional backyard courtyard designs that don’t have any lack of home coziness. Elements Utilize natural light and classic materials in your traditional backyard aesthetic. Incorporate lots of flowers, greenery, and opt for a classic paving stone like cobble. Start Designing The Backyard Courtyard Of You Dreams Today New Life Rockeries has been on a mission to help PNW homeowners beautify their backyards for the last 30 years. Our landscaping experts work to create unique backyard designs for our clients and want to help you. Our team can create a gorgeous courtyard that matches your aesthetic and completes your home. If you would like to talk with one of our landscape experts about designing a courtyard for your home contact New Life Rockeries today. We would love to create a custom quote for your project and help you achieve your ideal home aesthetic. We want to help you create a backyard that you are proud of and feel at home in. Contact us today to begin designing the courtyard of your dreams.
Retaining Wall Repair: What to Do When Your Rock Starts Caving
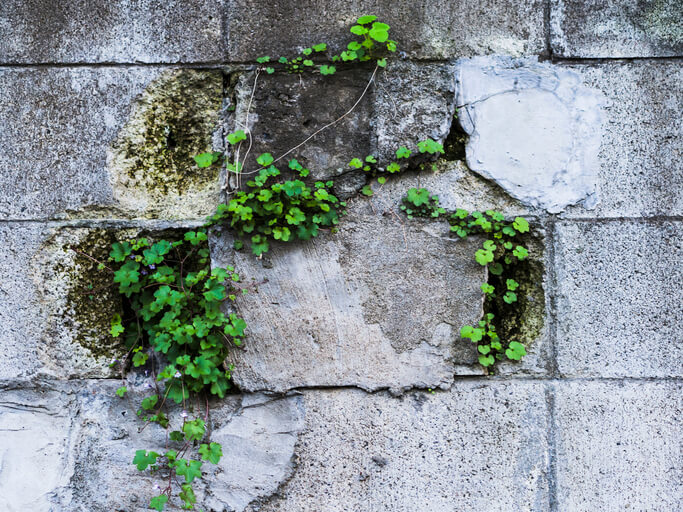
Retaining walls add so much dimension to an outdoor landscape. They are beautiful, add height, texture, and emotion to your outdoor aesthetic. All around, they are lovely additions to anyone’s yard. If you’ve had a rock retaining wall installed in your backyard and are just beginning to notice signs of deterioration, it might be time for a wall repair. Many homeowners don’t consider what kinds of repairs or maintenance their retaining wall might need in the future. Without anticipating repairs they are caught entirely off guard and they see their wall begin to crumble. There are a number of factors that might contribute to the breakdown of your retaining wall. If you know the causes, you may be able to avoid or postpone the deterioration of your retaining wall. In the next section, we’ll list three reasons why your retaining wall might be needing repairs. Why Is Your Retaining Wall Deteriorating? There are a number of reasons why your retaining wall might suddenly begin showing signs of deterioration. Don’t be too worried, as a landscaping professional should be able to repair your retaining wall if you contact them right away. Some factors which might play a role in the deterioration of your rock retaining wall include age, poor drainage, and foundation issues. Let’s break down each one of these below. 1. Age It is quite natural for your rock retaining wall to start needing repairs as it ages. Everything ages and wears down over time. If your retaining wall is over a few years old, it will likely show more signs of needing repairs. The good news is this shouldn’t be too difficult to remedy. Landscape professionals are able to repair old retaining walls and make them as good as new so that they are adding to your outdoor aesthetic rather than taking away from its beauty. 2. Poor Drainage If your yard suffers from drainage issues, that can be enough cause for detrimental damage to your retaining wall and should be dealt with immediately. Water damage to the foundation of your retaining wall can require extensive repairs. If you have drainage issues in your yard, landscape professionals may be able to repair your retaining wall and install weep holes in the wall to allow for better drainage. 3. Bad Foundation If your retaining wall was installed on a poor foundation that can cause it to crumble and break down rapidly. If the installation of your retaining wall was questionable and you are seeing it break down much sooner than you had expected, call in a team of landscapers to repair your retaining wall and remedy the foundation issue. Each of these issues is enough to call in a professional landscaping team to take a look and repair your damaged retaining wall. Don’t Attempt To Repair A Retaining Wall Yourself Many homeowners think that repairing their retaining wall doesn’t require professional skills and that they should be able to DIY it themselves. This, however, is often not the case as most retaining walls require professional installation services and so also require professional repairing. If you had a professional landscaping crew install the wall, you should call in professionals to repair it as well. Calling landscaping experts is a far better choice than trying to make the repair yourself. Attempting to repair your retaining wall yourself will give more work to the landscaping crew in the long run and could potentially add on damage to your retaining wall. Landscapers have experience installing and repairing retaining walls and are able to spot the root problem behind your rock walls decay. A rock retaining wall often serves dual purposes, combining aesthetics with functionality (some walls are used to prevent soil erosion from spilling into your yard on top of their design). You do not want to sacrifice either of these by doing a DIY repair job, so contact a landscaping crew as soon as you detect a problem. When Should You Replace & When Should You Repair Your Retaining Wall? Knowing when to repair or replace your rock retaining wall can be a challenge. This most likely will take a visual assessment from your landscaping experts. Sometimes, if you have allowed the deterioration to persist without intervention or repair you might need a total replacement. Unless you are a landscape professional, it will be difficult to make that assessment yourself. This makes it important to schedule a visual assessment with professional landscapers to determine the condition of your retainer wall. Benefits Of Hiring A Professional Crew To Fix Your Retaining Wall Hiring a professional landscaping crew for retaining wall repairs is by far the easiest option if you’ve begun to notice caving or decay. Your landscaping experts will be very honest with you about the condition of your rock retaining wall and how it can best be repaired. If you have started noticing the decay of your retaining wall and want to make the repairs before it’s too late, contact our crew of landscape professionals at New Life Rockeries today to get a quote on your repair. We employ only the best on our team of landscaping experts and assess skills, integrity, and work ethic during the hiring process. We understand the importance of our jobs in helping homeowners achieve the home of their dreams and want to help you repair your retaining wall for optimal functionality. If you’d like to receive a quote from us about repairing your retaining wall, contact us today and we’d be more than happy to discuss retaining wall contractors with your repairs.
7 Pro Tips to Help You Design a Stunning Backyard Waterfall
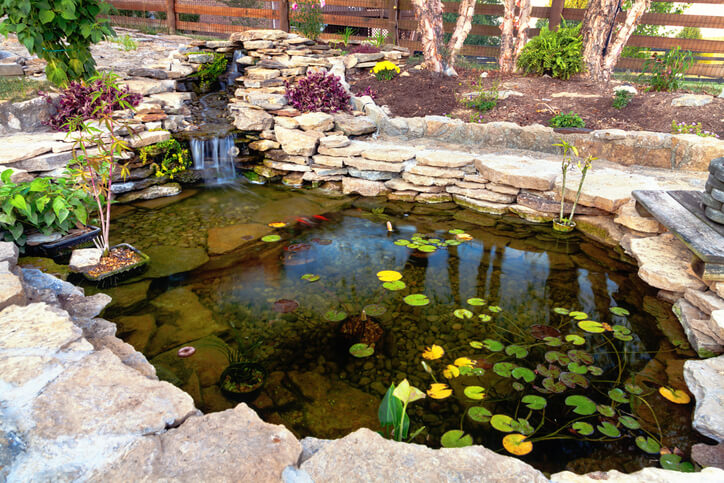
Water features come in all shapes and sizes, but waterfalls are among the most popular choices. Today, you can find backyard waterfall designs that are suitable for small or large spaces alike. That said, there are many elements you need to take into consideration when adding a waterfall to your yard. This article will give 7 tips to help you design a beautiful waterfall for your backyard. Why Should You Install A Waterfall In Your Backyard? A waterfall can be beneficial to your backyard in many ways. For one, it brings a natural ambiance to your space through sight and sound. There is almost nothing more calming than the sound of flowing water. Waterfalls also provide your backyard with a noise-masking effect that homeowners find immensely appealing. The stones used to build a waterfall along with the natural sound of the falls reduce other city noises. Besides the acoustic benefits, another advantage of waterfall features is the wide range of design possibilities. From sleek and modern, to rustic and weathered, installing a waterfall in your backyard has a massive impact on your landscape’s look and feel. 7 Tips For Designing A Stunning Backyard Waterfall 1. Consider Height First off, think about what effect you are hoping to achieve with your waterfall. This will help determine the height of the waterfall and more. Many homeowners want an eye-catching waterfall and so they think that bigger equals better. Yet, this isn’t always true. Do you want your water feature to be the most dominant feature in your yard, or would it be more impactful if it was placed subtly in a corner? Deciding on effect and height should be your first consideration when designing your backyard waterfall. You should assess your intentions for the effect you hope your waterfall will produce in your outdoor aesthetic as well as do an analysis of your yard to determine the best waterfall height for your landscape. 2. Keep The Waterfall In Scale With The Pond This is where many waterfalls go wrong. Failing to keep your waterfall at an appropriate scale to your pond will result in a less tasteful landscape overall. This is something you can discuss with your landscape professionals as they have experience designing backyard waterfalls and are familiar with what is considered an appropriate scale. 3. Increase The Height Of The Waterfall For Natural Ambience The higher you make your waterfall, the more running water sounds will be produced. If you want to emphasize the natural ambiance of running water throughout your backyard, then you should consider increasing the height of your waterfall as this will help you amplify the running water sounds. 4. Implement Multiple Elements Into Your Waterfall Design Use stones of varying colors and dimensions to add character to your waterfall design. Implementing ground covering plants and shrubs to give your landscape a natural feel. Flowers, shrubs, and stones can all be used to add aesthetic appeal to your backyard waterfall and to give it an intentional and finished look. 5. Pick The Appropriate Pump For Your Waterfall Depending on the size of your waterfall, you will be in need of a different sized pump to keep the water circulating. Your landscaping contractor experts will be able to advise you as to the most appropriate sized pump for the waterfall you are having installed. Using an incorrectly sized pump for your waterfall could cause a host of issues, such as flooding, so it’s important to get the pump size right. 6. Find Other Backyard Waterfalls That You Like Designing the most stunning waterfall for your backyard often involves gathering inspiration from other people’s waterfall designs. Do some searching online to help you get an idea of the type of waterfall you are hoping to have installed and don’t be afraid of mimicking features that you like. If you are having a waterfall installed in your backyard you want to be sure that you are going to love it. It can change a lot about your outdoor landscape so it should be something that you are confident that you are going to love. 7. Prevent Other Plants From Taking Over Your Waterfall A good and relatively easy way to prevent other plants from taking over the space that you’ve designated for your waterfall is by extending the pond liner by 12 inches or so and cover the liner with gravel. If you extend the liner beyond the edge of the pond you will be able to keep a handle on what plants are growing alongside your waterfall. Get A Quote From Landscape Professionals Today To hear more about what goes into getting a waterfall installed, or to get a free quote call us today. If you have decided to have a waterfall installed in your backyard or garden you should consult a landscape professional regarding installation. Installing a backyard waterfall might sound like a fun DIY project, but a lot more goes into designing a waterfall than meets the eye. Working with a landscaping team will ensure that your backyard water feature is done right the first time and on schedule. Contact New Life Rockeries today!
Everything You Need to Know About Creating a Moss Garden
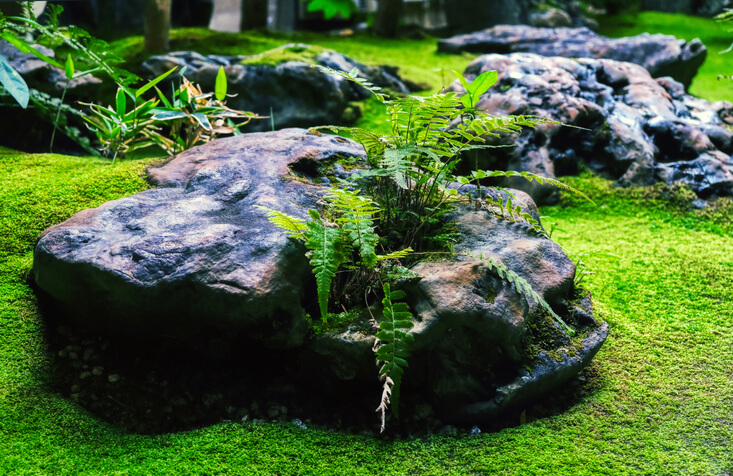
If you are looking for an inexpensive and low-maintenance way to spruce up your yard this year, then you should consider adding a moss garden to your landscape. Moss gardens are aesthetically pleasing and add color, texture, and a lush, foresty feel that is rarely found in other types of gardens. On top of these wonderful aesthetic benefits, moss gardens require minimal upkeep — yet another amazing perk for homeowners with limited amounts of time. If you are attracted to a woodland, mythical look, a moss garden is the way to go. With just a small, shady patch of yard, you can completely transform your outdoor aesthetic. Best of all, moss gardens are well-adapted to the Pacific Northwest’s wet climate and don’t require a lot of maintenance. How To Create The Perfect Moss Garden In order to create the perfect moss garden for your home, it is helpful to use a variety of plants and design elements to create a canvas to plant your moss in. Include a combination of different things in your moss garden, using multiple shades, textures, and sizes to achieve your desired look. For example, a small rock wall would add depth, color, and texture to your moss garden. Small rockeries can add a nice contrast to your moss garden and can also be used as a lovely backdrop. Use other elements like flagstone or small round rocks throughout your moss garden to draw in people’s attention. As for plants, shade-loving plants are accustomed to growing in the mossy woodland terrain. Plants like ferns or hostas thrive in the shade and are common companions to moss, making them a natural choice for any moss garden. What Are The Main Types Of Moss? There are more than 12,000 species of moss, however, since that is far too large a number to break down here, let’s sort the different kinds of moss into more digestible categories. There are just two main kinds of moss used for moss gardens. Acrocarpous – moss is characterized by its ability to stands upright Pleurocarpous – moss is prostrate and tends to grow at a faster rate than Acrocarpous moss. There are numerous other moss-like plants that are mistakenly labeled as moss and used in moss gardens, however, these lack certain of the defining qualities of true moss and do not always thrive in moss gardens. How Will A Moss Garden Benefit Your Yard? Moss gardens require minimal maintenance and upkeep — making them an ideal garden type for homeowners without a lot of spare time. Moss gardens also thrive in overcast, shady conditions which make them perfect for Washington homeowners trying to accommodate Pacific Northwestern weather. On top of the ease of having a moss garden, these gardens also boast of other benefits such as increased visual appeal and texture throughout your yard. A little goes a long way when it comes to gardening and yard maintenance, you’ll be surprised by just how much of a difference a moss garden can make in your backyard. Moss is also extremely beneficial for air purification, a fact which many homeowners find to be a driving incentive when creating a moss garden. So on top of being extremely beautiful, moss gardens can be beneficial for your health and home as well. How To Maintain Your Moss Garden As mentioned above, maintenance for a moss garden is relatively simple and minimal. Because moss is accustomed to growing in damp conditions, it is important to keep the soil around your moss consistently moist. This shouldn’t be too much trouble if you live in the Pacific Northwest where rain is plentiful and the climate relatively mild. If you do encounter particularly warm or dry weather, simply take a spray bottle and mist the moss. Besides the occasional misting, your moss garden should be given a good watering (whether by rain or hose) about twice a week. Have A Custom Moss Garden Installed In Your Yard! Here at New Life Rockeries, we employ a team of only the most diligent landscaping professionals. We are able to take the aesthetic vision of our clients and act on what they’ve envisioned to create beautiful, cohesive yard spaces. If you are in need of landscaping services of any kind, our experts at New Life Rockeries would be thrilled to help you out. We have extensive experience designing and building rock walls, rock water features, moss gardens, rock gardens, and many more home aesthetics. If you are unsure what landscape adjustments to make to your yard, don’t worry! Our experts at New Life Rockeries landscape contractor would be more than happy to help you find a landscape design that works for you and your home and can give you a price quote as well. To begin your yard makeover, call our experts at New Life Rockeries today.
8 Rock Garden Accessories that Improve Beauty and Functionality
Adding landscape design to your home will give your outdoor aesthetic a sense of completion and produce that extra ‘wow’ reaction from your guests that you are hoping to achieve. A practical way that you can implement landscape design into your yard that won’t require a lot of maintenance is with a rock garden. Rock gardens add texture, color, and natural beauty to any home. They are easily created and require minimal attention from homeowners. Quite simply, adding a rock garden to your outdoor landscape is one of the easiest ways to improve your outdoor aesthetic and requires hardly any additional exertion on your part. Whether you already have a rock garden or are planning on having one put in soon, here are 8 accessories that will improve the beauty or functionality of your rock garden. Hopefully, this list will inspire you and give you a better idea of what you are looking for in a rock garden. 1. A Variety Of Plants You should implement a variety of different kinds of plants into your rock garden. Depending on your climate and the layout of your yard, different plants may be better suited to your rock garden. If you have a particularly wet yard, you may find that certain plants such as succulents and cacti do not thrive in your environment. Based off of your specific yard you should select plants that will thrive as well as compliment each other. Using a variety of plants will increase aesthetic appeal, add texture and depth, as well as compliment your rock garden. The best plants for rock gardens often have a wilder look to them, lending your garden a more natural and earthy feel as a result. 2. Moss For Texture & Age Allowing moss to grow in your rock garden can give it an aged sort of feel that many homeowners find very attractive. Moss adds an element of age and character as well as texture. The distinct mossy green color also lends an attractive aspect to the overall appeal of a rock garden and this is an easily implemented aspect of rock gardens. 3. Beautiful Pottery Adding beautiful pottery throughout your rock garden will give it an overall sense of completion. Beautiful pottery can be useful not only for adding color and style in your rock garden but also for growing plants. Perhaps the soil beneath your rock garden is slightly too damp for growing certain types of plants that you would like in your rock garden, in such scenarios potted plants come to your aid. Choose beautiful and complimentary pottery as well as decorative plants. Many homeowners find that plants that spread or spill over the sides of their pots into the rock garden look especially complimentary, as the greens or browns of the plants contrast against the muted hues of the rock garden. 4. Allow Nature To Take Over If you are looking to create a more natural, wild rock garden, you will be happy to hear that this isn’t all that difficult to do. Instead of actively maintaining and manicuring your rock garden, simply allow nature to take over and work her magic. Allow nature plants to spring up and moss to grow in your rock garden. This will help you achieve that more natural and wild look that you may be going for and it makes having a rock garden even easier than it already would be since you have even less to maintain. 5. Add A Water Feature Or Pond Adding a water feature or pond to your rock garden will attract more wildlife to your yard and add a sense of serenity to your landscape. Water features are highly customizable so take the opportunity to make your landscape entirely unique, giving that personal flair to your space. Adding a boulder fountain is a wonderful way to add movement to your rock garden while also continuing with the theme of natural rock and stone. Regardless of your preferred style, there are countless water feature styles that can be customized in numerous ways to suit your style and that of your rock garden. 6. Add A Small Rock Wall Having a small rock wall in or around your rock garden will add depth to your landscape. You can get creative when it comes to the height and materials used to build your rock wall, this will further characterize your rock garden and make it uniquely your style. Having a rock wall will help define your rock garden and may also help prevent soil erosion, acting as a mini retaining wall. 7. Accent Stones Stones or boulders can serve as accents, to compliment the entirety of your rock garden or can be used to draw the eyes to a specific area of your rock garden, serving as a focal point. Stones and boulders are incredibly versatile in the number of ways they can be used in and are a simple way for homeowners to create a theme or focal point in or throughout their rock garden. You may use a small boulder or two to define the parameters of your rock garden or use a flat stone such as flagstone to create a small footpath through your rock garden. Doing so will add beauty and design to your rock garden and can really serve to bring all of the details throughout your landscape together. 8. Vintage Watering Can Of course, no rock garden landscape is complete without a vintage watering can. Adding a vintage accent or two will complement your rock garden if you are going for a more aged look. This isn’t limited to watering cans only, you can also add other vintage pieces such as lanterns and pottery if you are especially going for a more aged look. Contact New Life Rockeries Today! New Life Rockeries is proud to assist homeowners in the Pacific Northwest to achieve their landscape dreams. If you are looking to
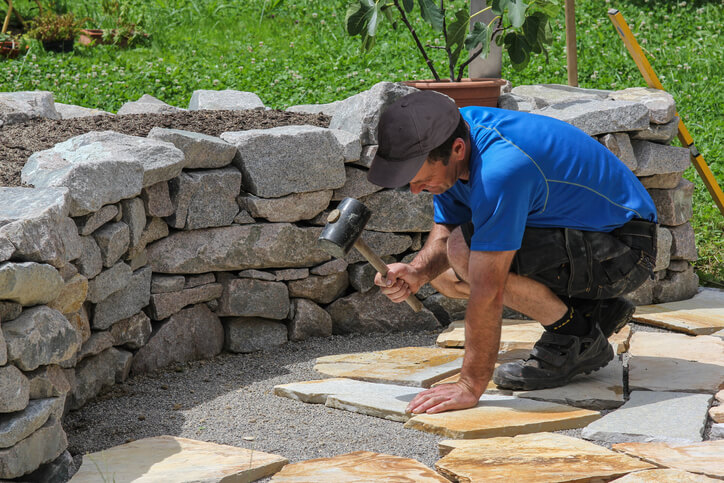
Flagstone Patios 101: Benefits, Costs, and Pro Hiring Tips
Installing a flagstone patio in your backyard comes with a host of details to consider. Many homeowners love the idea of a flagstone patio due to the natural aesthetic and design flexibility, but there are a few things that you, as a homeowner should consider prior to having a flagstone patio installed. Flagstone is a great choice rock to use for your yard space. What is Flagstone? First off, let’s start with what flagstone actually is. Contrary to what many people assume, flagstone is not a geological term, but rather, a colloquial term referring to a group of stones that carry specific attributes. Stones that are under the umbrella of the flagstone family include sandstone, limestone, slate, travertine, as well as other similar stones. Flagstones are categorized by their flat surface and are usually made from sedimentary rock. A sedimentary rock splits along layers resulting in a flat, thin stone perfect for patios. Benefits of Flagstone Patios Flagstone patios offer many benefits. If you are a homeowner who is considering this type of patio, here are a few of the benefits to aid you on your decision making journey. Flagstone is Versatile Due to varying dimensions, shades, and shapes, flagstone is extremely versatile and is able to accompany virtually any home style. You can opt for a bluish flagstone patio, red or rich brown stones, or if you want to be extra creative, you can even mix and match. Besides being incredibly versatile color and shapewise, flagstone can also be easily used for either indoor or outdoor patios. Flagstone is acid resistant meaning that it can be laid directly on soil without the need for a concrete or aggregate foundation. Flagstone is Reasonably Priced Flagstone, being a natural and extremely versatile stone, can seem a little on the pricier side at first glance. However, if you consider what you are getting for your money, flagstone is actually quite a good investment for homeowners. It is durable, weather resistant will last for many years, and is exceptionally beautiful. Installation is relatively simple, some homeowners even opting to install their own flagstone patios, and replacements or repairs are extremely convenient. For most flagstones, you can expect to pay between $15 and $30 dollars per square foot. If this is out of your price range, consider using flagstone in conjunction with other complementary materials such as brick or concrete. An additional way that you may cut down on cost when having flagstone installed is by dry laying the stones over a sand and gravel base instead of having it laid on a concrete base. Flagstone is Durable Flagstone is a highly durable patio option. It can withstand varying climates, is slip resistant, and is convenient to maintain or repair. If roots grow beneath your flagstone patio it won’t crack (unlike concrete patios) and you can remedy your roots issue with a simple adjustment of sand to level out your flagstone. Roots that grow underneath may press up on the patio, but unlike a concrete patio, it won’t crack. Replacing or repairing damaged flagstones is also relatively simple. Flagstone Allows for Aesthetic Creativity Flagstone, due to its organic look and natural hues, allows homeowners extensive amounts of aesthetic creativity. You may use a variety of different shapes, dimensions, and shades to add character and texture throughout your yard. Flagstone patios compliment firepits, patio furniture, gardens, and ponds in a unique way that can define your yard. You can use a flagstone patio to bring the details of your yard together into cohesivity or a complementary color palette. If you are looking for a formal look throughout your yard, flagstone patios can easily manage the job with a deep color palette and crisp edges, your yard will look like it was made for a landscaping catalog. If you wish for a more natural and wild aesthetic, you can utilize flagstone to achieve this look as well. Go for varying shapes, sizes, and colors of flagstone. Allow a small grout between stones for wildflower or moss growth. Opting for a more irregular and random flagstone patio fashion will ensure that your yard looks wild and natural. Plants like Dichondra, sedum or moss grow well between flagstones so be on the lookout for these. Another pro-tip is to purchase flagstone that is native to your region. This will cut costs down and will lend an additional natural element to your design. Having a Flagstone Patio Installed in Your Yard Flagstone installation is a custom job that requires a certain level of expertise and artistry. If you intend to have your flagstone paved on ground soil, you will first need a base layer with gravel and sand before the flagstone can be installed. Once the pavers have been set, they must be secured with polymeric sand as a filler. This sand filler lends its soil binding properties to depress the growth of seeds buried in the ground. Installing a flagstone patio is a highly customized job that often requires specific tools and knowledge. Working with a professional landscape designer will ensure that you have the most beautiful flagstone patio and that you didn’t make costly mistakes along the way with the installation. Hiring the Best Landscape Designers to Install Your Flagstone Patio New Life Rockeries has been proudly serving homeowners in the Pacific Northwest for more than 30 years. Our team of landscape experts specializes in creating landscape designs and rockery installation. We would love to help you with your patio installation or outdoor aesthetic improvement. If you would like to receive a quote for your project or have additional questions, contact our landscape experts today, we’d be more than happy to have a chat with you.
How to Choose the Best Rockery Design for Your Small Garden
Rockeries and rock features in gardens make wonderful backyard additions. They add a beautiful, clean, and organized aesthetic to any space — making them a desired home improvement. If you have limited backyard space, adding a small rockery design can do wonders in helping your backyard look and feel much larger than it is. If you have always wanted to add a rockery to your backyard but have put it off because you think it will clutter the little space you have, that will not be an issue! There are countless rockery and rock garden designs curated for small backyards. By working with a rockery professional, you can learn what rockery design features are perfect for your small garden. In the meantime, here are 7 of our best small rockery design tips to get you started on beautifying your garden. 1. Find the Perfect Location to Build Your Rockery This is the first step when it comes to rockery design and improving your backyard. Before beginning to build your small rockery, you need to look over your backyard and decide where you would like to build it. If you are going for a rock garden, you may want to put it towards the rear or to one side of your backyard. However, you’ll want to consider front or center locations if you want to add a rock fire pit or water feature. By taking the time to find the perfect location for your rockery design, you can make sure that your garden will be able to successfully highlight features of your yard. After all, you don’t want to start building a small rockery in your garden that won’t fit properly in that corner of the yard or begin installing a firepit where the yard floods during the summer. 2. Determine Your Aesthetic Preferences What is your style? Chances are, your home reflects your aesthetic preferences and style extremely well. In a similar way, your backyard garden should also reflect your style. Determining your likes and dislikes will help you avoid wasted time and lost money and will also ensure that you end up with a beautiful rock garden that you are proud of. Spend some time determining your style and figuring out your aesthetic preferences for your backyard. One way to do this is to look at photos of other small gardens with rockeries and take note of what rockery designs and features you like and don’t like. 3. What Types of Rock are Best for Your Small Rockery? It’s important to consider what kinds of rock you want to use in your rockery design. If you are hoping to install a vintage themed rockery design for your small garden, then you should use rocks that are softer and more porous. This will help your rockery achieve that aged, weathered look much quicker. On the contrary, harder, less porous rocks maintain their “new” appearance much longer. You don’t want these kinds of rock in a vintage garden, but do want them in a modern-styled rockery. 4. Make the First Sketch Once you have found the location where you will put your small rockery and you’ve determined your aesthetic preferences, take a day or two to draw up the first sketch. Something that might help you during the sketching process is looking up other rockery designs online. Sketching it out will help you make sure that the rockery design you see in your head will look good in your backyard. 5. Use Different Shapes, Sizes, & Elements If you are looking for a way to add natural beauty to your small backyard, you might be surprised at how easy it is to do. Utilizing different natural elements in your small backyard rockery will give your space a unique, creative look and feel. You can achieve this by implementing rocks, bark, and ground cover plants in your small rockery design. Remembering to add these kinds of elements will give you access to a whole new range of colors and textures. If you love spending time in nature or simply want to spruce up your small backyard, be sure to implement many different sized elements with color and texture to add an earthy, artistic look. 6. Use Rockeries to add a Focal Point Does your yard lack a focal point? The wonderful thing about rockeries is that they can easily be used as a means to add a focal point to your small backyard. You can do this by adding a prominent water feature to the center of your garden or using a boulder to draw the visitor’s eye. Adding a rockery focal point to your small backyard can make such an immediate difference and can help your yard feel very intentional and cohesive. 7. Contact our Team of Professional Landscapers Today! Adding a small rockery that reflects your personal style will compliment your backyard and give your home a feeling of completeness. Such a big endeavor should not be undertaken alone. By working with a professional landscape contractor you can ensure that your rockery design is properly installed. New Life Rockeries has been serving Pacific Northwest homeowners for more than 30 years. We specialize in rockeries and landscape design and would love to help you improve your outdoor aesthetic. If you would like to add a rockery design to your small garden, contact us today to speak with one of our rockery professionals. We’d be happy to answer any of the questions you may have about our services or provide you with a quote for your backyard project.