Learning Center

Learning Center

Request a Quote

8 Rock Garden Accessories that Improve Beauty and Functionality

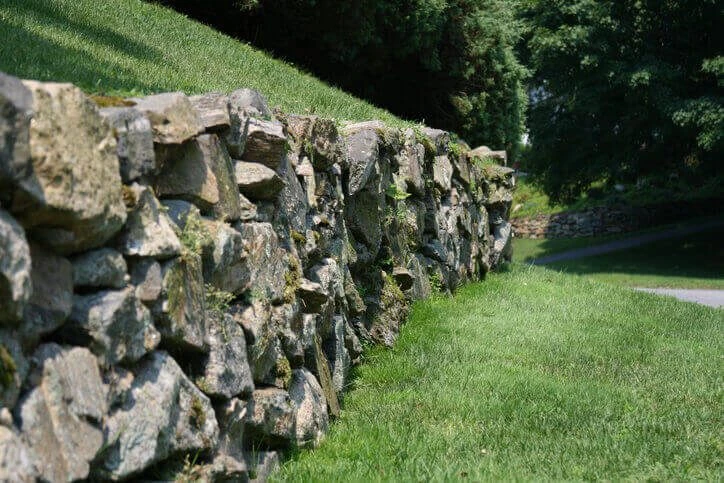
Adding landscape design to your home will give your outdoor aesthetic a sense of completion and produce that extra ‘wow’ reaction from your guests that you are hoping to achieve. A practical way that you can implement landscape design into your yard that won’t require a lot of maintenance is with a rock garden. Rock gardens add texture, color, and natural beauty to any home. They are easily created and require minimal attention from homeowners. Quite simply, adding a rock garden to your outdoor landscape is one of the easiest ways to improve your outdoor aesthetic and requires hardly any additional exertion on your part. Whether you already have a rock garden or are planning on having one put in soon, here are 8 accessories that will improve the beauty or functionality of your rock garden. Hopefully, this list will inspire you and give you a better idea of what you are looking for in a rock garden.   1. A Variety Of Plants You should implement a variety of different kinds of plants into your rock garden. Depending on your climate and the layout of your yard, different plants may be better suited to your rock garden. If you have a particularly wet yard, you may find that certain plants such as succulents and cacti do not thrive in your environment. Based off of your specific yard you should select plants that will thrive as well as compliment each other. Using a variety of plants will increase aesthetic appeal, add texture and depth, as well as compliment your rock garden. The best plants for rock gardens often have a wilder look to them, lending your garden a more natural and earthy feel as a result.   2. Moss For Texture & Age Allowing moss to grow in your rock garden can give it an aged sort of feel that many homeowners find very attractive. Moss adds an element of age and character as well as texture. The distinct mossy green color also lends an attractive aspect to the overall appeal of a rock garden and this is an easily implemented aspect of rock gardens.   3. Beautiful Pottery Adding beautiful pottery throughout your rock garden will give it an overall sense of completion. Beautiful pottery can be useful not only for adding color and style in your rock garden but also for growing plants. Perhaps the soil beneath your rock garden is slightly too damp for growing certain types of plants that you would like in your rock garden, in such scenarios potted plants come to your aid. Choose beautiful and complimentary pottery as well as decorative plants. Many homeowners find that plants that spread or spill over the sides of their pots into the rock garden look especially complimentary, as the greens or browns of the plants contrast against the muted hues of the rock garden.   4. Allow Nature To Take Over If you are looking to create a more natural, wild rock garden, you will be happy to hear that this isn’t all that difficult to do. Instead of actively maintaining and manicuring your rock garden, simply allow nature to take over and work her magic. Allow nature plants to spring up and moss to grow in your rock garden. This will help you achieve that more natural and wild look that you may be going for and it makes having a rock garden even easier than it already would be since you have even less to maintain.   5. Add A Water Feature Or Pond Adding a water feature or pond to your rock garden will attract more wildlife to your yard and add a sense of serenity to your landscape. Water features are highly customizable so take the opportunity to make your landscape entirely unique, giving that personal flair to your space. Adding a boulder fountain is a wonderful way to add movement to your rock garden while also continuing with the theme of natural rock and stone. Regardless of your preferred style, there are countless water feature styles that can be customized in numerous ways to suit your style and that of your rock garden.   6. Add A Small Rock Wall Having a small rock wall in or around your rock garden will add depth to your landscape. You can get creative when it comes to the height and materials used to build your rock wall, this will further characterize your rock garden and make it uniquely your style. Having a rock wall will help define your rock garden and may also help prevent soil erosion, acting as a mini retaining wall.   7. Accent Stones Stones or boulders can serve as accents, to compliment the entirety of your rock garden or can be used to draw the eyes to a specific area of your rock garden, serving as a focal point. Stones and boulders are incredibly versatile in the number of ways they can be used in and are a simple way for homeowners to create a theme or focal point in or throughout their rock garden. You may use a small boulder or two to define the parameters of your rock garden or use a flat stone such as flagstone to create a small footpath through your rock garden. Doing so will add beauty and design to your rock garden and can really serve to bring all of the details throughout your landscape together.   8. Vintage Watering Can Of course, no rock garden landscape is complete without a vintage watering can. Adding a vintage accent or two will complement your rock garden if you are going for a more aged look. This isn’t limited to watering cans only, you can also add other vintage pieces such as lanterns and pottery if you are especially going for a more aged look.   Contact New Life Rockeries Today! New Life Rockeries is proud to assist homeowners in the Pacific Northwest to achieve their landscape dreams. If you are looking to

Read More »

Flagstone Patios 101: Benefits, Costs, and Pro Hiring Tips

Installing a flagstone patio in your backyard comes with a host of details to consider. Many homeowners love the idea of a flagstone patio due to the natural aesthetic and design flexibility, but there are a few things that you, as a homeowner should consider prior to having a flagstone patio installed. Flagstone is a great choice rock to use for your yard space.   What is Flagstone? First off, let’s start with what flagstone actually is. Contrary to what many people assume, flagstone is not a geological term, but rather, a colloquial term referring to a group of stones that carry specific attributes. Stones that are under the umbrella of the flagstone family include sandstone, limestone, slate, travertine, as well as other similar stones. Flagstones are categorized by their flat surface and are usually made from sedimentary rock. A sedimentary rock splits along layers resulting in a flat, thin stone perfect for patios.   Benefits of Flagstone Patios Flagstone patios offer many benefits. If you are a homeowner who is considering this type of patio, here are a few of the benefits to aid you on your decision making journey. Flagstone is Versatile Due to varying dimensions, shades, and shapes, flagstone is extremely versatile and is able to accompany virtually any home style. You can opt for a bluish flagstone patio, red or rich brown stones, or if you want to be extra creative, you can even mix and match. Besides being incredibly versatile color and shapewise, flagstone can also be easily used for either indoor or outdoor patios. Flagstone is acid resistant meaning that it can be laid directly on soil without the need for a concrete or aggregate foundation. Flagstone is Reasonably Priced Flagstone, being a natural and extremely versatile stone, can seem a little on the pricier side at first glance. However, if you consider what you are getting for your money, flagstone is actually quite a good investment for homeowners. It is durable, weather resistant will last for many years, and is exceptionally beautiful. Installation is relatively simple, some homeowners even opting to install their own flagstone patios, and replacements or repairs are extremely convenient. For most flagstones, you can expect to pay between $15 and $30 dollars per square foot. If this is out of your price range, consider using flagstone in conjunction with other complementary materials such as brick or concrete. An additional way that you may cut down on cost when having flagstone installed is by dry laying the stones over a sand and gravel base instead of having it laid on a concrete base. Flagstone is Durable Flagstone is a highly durable patio option. It can withstand varying climates, is slip resistant, and is convenient to maintain or repair. If roots grow beneath your flagstone patio it won’t crack (unlike concrete patios) and you can remedy your roots issue with a simple adjustment of sand to level out your flagstone. Roots that grow underneath may press up on the patio, but unlike a concrete patio, it won’t crack. Replacing or repairing damaged flagstones is also relatively simple. Flagstone Allows for Aesthetic Creativity Flagstone, due to its organic look and natural hues, allows homeowners extensive amounts of aesthetic creativity. You may use a variety of different shapes, dimensions, and shades to add character and texture throughout your yard. Flagstone patios compliment firepits, patio furniture, gardens, and ponds in a unique way that can define your yard. You can use a flagstone patio to bring the details of your yard together into cohesivity or a complementary color palette. If you are looking for a formal look throughout your yard, flagstone patios can easily manage the job with a deep color palette and crisp edges, your yard will look like it was made for a landscaping catalog. If you wish for a more natural and wild aesthetic, you can utilize flagstone to achieve this look as well. Go for varying shapes, sizes, and colors of flagstone. Allow a small grout between stones for wildflower or moss growth. Opting for a more irregular and random flagstone patio fashion will ensure that your yard looks wild and natural. Plants like Dichondra, sedum or moss grow well between flagstones so be on the lookout for these. Another pro-tip is to purchase flagstone that is native to your region. This will cut costs down and will lend an additional natural element to your design.   Having a Flagstone Patio Installed in Your Yard Flagstone installation is a custom job that requires a certain level of expertise and artistry. If you intend to have your flagstone paved on ground soil, you will first need a base layer with gravel and sand before the flagstone can be installed. Once the pavers have been set, they must be secured with polymeric sand as a filler. This sand filler lends its soil binding properties to depress the growth of seeds buried in the ground. Installing a flagstone patio is a highly customized job that often requires specific tools and knowledge. Working with a professional landscape designer will ensure that you have the most beautiful flagstone patio and that you didn’t make costly mistakes along the way with the installation.   Hiring the Best Landscape Designers to Install Your Flagstone Patio New Life Rockeries has been proudly serving homeowners in the Pacific Northwest for more than 30 years. Our team of landscape experts specializes in creating landscape designs and rockery installation. We would love to help you with your patio installation or outdoor aesthetic improvement. If you would like to receive a quote for your project or have additional questions, contact our landscape experts today, we’d be more than happy to have a chat with you.

Read More »

How to Choose the Best Rockery Design for Your Small Garden

Rockeries and rock features in gardens make wonderful backyard additions. They add a beautiful, clean, and organized aesthetic to any space — making them a desired home improvement. If you have limited backyard space, adding a small rockery design can do wonders in helping your backyard look and feel much larger than it is. If you have always wanted to add a rockery to your backyard but have put it off because you think it will clutter the little space you have, that will not be an issue! There are countless rockery and rock garden designs curated for small backyards. By working with a rockery professional, you can learn what rockery design features are perfect for your small garden. In the meantime, here are 7 of our best small rockery design tips to get you started on beautifying your garden.   1. Find the Perfect Location to Build Your Rockery This is the first step when it comes to rockery design and improving your backyard. Before beginning to build your small rockery, you need to look over your backyard and decide where you would like to build it. If you are going for a rock garden, you may want to put it towards the rear or to one side of your backyard. However, you’ll want to consider front or center locations if you want to add a rock fire pit or water feature. By taking the time to find the perfect location for your rockery design, you can make sure that your garden will be able to successfully highlight features of your yard. After all, you don’t want to start building a small rockery in your garden that won’t fit properly in that corner of the yard or begin installing a firepit where the yard floods during the summer.   2. Determine Your Aesthetic Preferences What is your style? Chances are, your home reflects your aesthetic preferences and style extremely well. In a similar way, your backyard garden should also reflect your style. Determining your likes and dislikes will help you avoid wasted time and lost money and will also ensure that you end up with a beautiful rock garden that you are proud of. Spend some time determining your style and figuring out your aesthetic preferences for your backyard. One way to do this is to look at photos of other small gardens with rockeries and take note of what rockery designs and features you like and don’t like.   3. What Types of Rock are Best for Your Small Rockery? It’s important to consider what kinds of rock you want to use in your rockery design. If you are hoping to install a vintage themed rockery design for your small garden, then you should use rocks that are softer and more porous. This will help your rockery achieve that aged, weathered look much quicker. On the contrary, harder, less porous rocks maintain their “new” appearance much longer. You don’t want these kinds of rock in a vintage garden, but do want them in a modern-styled rockery.   4. Make the First Sketch Once you have found the location where you will put your small rockery and you’ve determined your aesthetic preferences, take a day or two to draw up the first sketch. Something that might help you during the sketching process is looking up other rockery designs online. Sketching it out will help you make sure that the rockery design you see in your head will look good in your backyard.   5. Use Different Shapes, Sizes, & Elements If you are looking for a way to add natural beauty to your small backyard, you might be surprised at how easy it is to do. Utilizing different natural elements in your small backyard rockery will give your space a unique, creative look and feel. You can achieve this by implementing rocks, bark, and ground cover plants in your small rockery design. Remembering to add these kinds of elements will give you access to a whole new range of colors and textures. If you love spending time in nature or simply want to spruce up your small backyard, be sure to implement many different sized elements with color and texture to add an earthy, artistic look.   6. Use Rockeries to add a Focal Point Does your yard lack a focal point? The wonderful thing about rockeries is that they can easily be used as a means to add a focal point to your small backyard. You can do this by adding a prominent water feature to the center of your garden or using a boulder to draw the visitor’s eye. Adding a rockery focal point to your small backyard can make such an immediate difference and can help your yard feel very intentional and cohesive.   7. Contact our Team of Professional Landscapers Today! Adding a small rockery that reflects your personal style will compliment your backyard and give your home a feeling of completeness. Such a big endeavor should not be undertaken alone. By working with a professional landscape contractor you can ensure that your rockery design is properly installed. New Life Rockeries has been serving Pacific Northwest homeowners for more than 30 years. We specialize in rockeries and landscape design and would love to help you improve your outdoor aesthetic. If you would like to add a rockery design to your small garden, contact us today to speak with one of our rockery professionals. We’d be happy to answer any of the questions you may have about our services or provide you with a quote for your backyard project.

Read More »

9 Landscaping Tips to Select the Best Backyard Design

Are you looking for ways to spruce up your backyard this spring? Perhaps you’ve been putting off adding landscaping to your backyard design because it seems like a really big project and you don’t want to start it without having a good idea of what your end goals are for the area. Landscape and outdoor maintenance play a very important role in your home’s aesthetic appeal and can influence how your home is perceived by guests when they first visit your house. As you consider adding backyard landscaping to your home, it’s important to decide which elements are most important to you and your outdoor aesthetic goals and consider any limitations you might face when making your outdoor alterations. If you have a smaller backyard, consider adding elements that will expand rather than clutter your space. On the flip side of that, if you have a large backyard you will want to find complementary elements to place strategically throughout your backyard to accentuate the angles or emotion you want to achieve. Here are some of our landscaping tips to start you out:   1. Find Other Landscapes That You Like First things first, look up other backyard landscapes online and find some designs that you like. This will give you an idea of what design style appeals to you, allowing you to be more clear with the landscaping crew when the time comes to make the alterations. Most likely your design style has a name on it, so a bit of reading and research will help you discover what plants, elements, and colors are best suited to you and your backyard.   2. Prioritize List the elements you wish to add to your backyard in order from most important to least. Adding landscaping to your backyard is an investment — one which will take time to fully complete — but you should be starting with your favorite elements and working down the list of prioritizes that way.   3. Do what is Comfortable If you spend a lot of time in your backyard or enjoy entertaining the company outside, it’s important to use a landscape design that prioritizes comfort. Consider adding functional, beautiful yard furniture, or a covered patio to enhance the comfort of your space and give it a cozy, home-like feel. Comfort is very important in backyard landscape design, especially for homeowners that enjoy entertaining during the warm summer months, so be sure to add a level of comfort to you outside space along with the stylish design features.   4. Add the Main Feature Consider adding a rockery design, a water feature, fire pit, or a stone patio to draw the eyes to a focal point in the yard. Having a focal point in your backyard will give you a center that you can design around and will give your yard a beautiful aesthetic look and feel. Adding a custom stone fireplace is a cozy addition for a summer-nights cookout or s’mores toasts with your guests.   5. Add a Theme to Your Backyard Design Consider going for a landscaping theme. You can use specific plants, shrubs, or stone elements creatively to give your yard a nice, cohesive feel. You can even consider bringing your home decor theme into your backyard, this will help your house and yard to be fully cohesive and complementary in style. You might not know what your indoor decor theme is, if this is the case, take a walk around your house and pay close attention to your decor details and design choices. It might take a bit of looking, but most likely you will see a pattern of repeated elements and style choices. Once you’ve pinned down your style, it will be easy to know what sort of theme you should go for with your landscape design.   6. Create Crisp Edges Lawn edging or utilizing retaining walls is a wonderful way to create angles and edges that look crisp and define different areas of your backyard. If you want to have multiple areas in your backyard that serve different purposes, having clean-cut edges is a good way to separate and organize your backyard landscape. Likewise, working with retaining wall contractors can improve the aesthetic of your backyard and can also be useful in keeping dirt from eroding and sliding down into your yard or garden bed.   7. Get Creative! Many homeowners associate backyard landscape design with plants, trees, and shrubs only — completely missing the many other elements that can be present in a beautiful backyard design. Stone and rockery elements can add a nice touch to the greenery and life in your backyard and can really enhance the natural colors present. Getting creative and utilizing all of the elements available to you will help you have a beautiful backyard that you love and that is designed perfectly to suit your needs and aesthetic desires.   8. Utilize Pots and Planters Pots and planters make beautiful additions to backyard design and are also extremely practical if you are a gardener or love the look of potted plants and shrubs. Take a trip down to your local home and gardens store to purchase some beautiful pots or consider having rock or brick planters built for certain areas in your backyard. As you can see, there are many ways to enhance your backyard aesthetic through landscape design. No matter what your design style or aesthetic taste, there will most certainly be backyard landscape designs that appeal to you.   9. Work With A Skilled Landscaper If you need any assistance with backyard design or landscaping tips, contact New Life Rockeries for expert landscaping contractor advice and services. New Life Rockeries is a landscape and stoneworks company that has been faithfully helping Washington homeowners achieve their ideal backyard landscaping goals for more than 35 years. Let us be the ones to create the perfect backyard for your home.

Read More »
Lynnwood Retaining Wall Contractors
Blog
Neil Eneix

Everything You Need to Know About Retaining Wall Maintenance

When it comes to sloped or terraced properties, nothing is quite as handy as a retaining wall. Not only are they gorgeous and add a brilliant aesthetic to the yard, but they are quite practical and useful at helping you utilize your outdoor space. However, when winter arrives, your retaining wall will likely have to be taken care of, lest the cold weather can wreak havoc on the foundation and the stones built into it. So, with that in mind, we want to take a moment and discuss the various ways that you can keep your retaining wall in tip-top shape this winter. Why Maintaining Your Retaining Wall is Crucial At first, you may think that your retaining wall is okay, even if it starts to show signs of wear and tear. After all, it’s all stone anyway, so what’s a little cold weather going to do to it? Unfortunately, if you ignore the signs, it can spell disaster. It may not happen immediately, but the issue has to be addressed sooner rather than later. For the most part, cold weather can create cracks in the stones of your wall. Even a small break can lead to a bigger one, which can impact the integrity of the wall, leading to its eventual collapse and, unfortunately, you can’t just grab cement out of your emergency kit to fix them. Assuming that you don’t want to have to rebuild your retaining wall (or a section of it anyway), taking care of these cracks as soon as possible is in your best interests. Here are some steps you can take to help prevent disaster. Inspect the Wall Regularly If your yard is buried in snow, then don’t worry about going out and inspecting the retaining wall. It’ll be more trouble than it’s worth. However, once it’s uncovered, you should go through and do a thorough inspection of it at least a couple of times during the winter months. Ideally, you should inspect it at the beginning, middle and the end of the season. When inspecting your retaining wall, look for both cracks in the stones themselves, as well as gaps in the mortar between them (assuming that there is mortar). As with cracks, missing mortar can only worsen over time, so you’ll want to patch any gaps immediately if possible. Another thing to watch out for is bulges in the wall. If you notice that some sections are bowing out, then it means that the soil is shifting, and it could cause a breach sometime soon. Depending on the severity of the bulge, you may want to call in the professionals as soon as possible so that they can assess the potential for a breach and correct it immediately. Don’t Treat Your Wall Beforehand It’s natural to want to coat your retaining wall in various ice prevention solutions before any snowfall sets in, but the fact is that those kinds of compounds will slowly erode the stones, which will wind up doing more harm than good. Consistent retaining wall contractors maintenance is key to keeping your wall in the best shape possible. Remove Debris From Any Drainage Pipe In some cases, your retaining wall will have a drainage pipe installed so that water runoff doesn’t pool at the base of it. Ideally, this pipe will be made of thick corrugated plastic so that it won’t rust or crack when cold weather sets in. However, it’s easy for the tube to get clogged, especially if you have snow in your area. Be sure to inspect the pipe regularly and remove any blockages that occur. Once the snow and ice melt, you’ll need the pipe to work as efficiently as possible, meaning that clogs could lead to water damage for your wall’s foundation. Fill in Eroded Areas After winter has passed, you’ll likely notice some effects of erosion, as water runoff and snowmelt will take some of the soil with it when it thaws. Any depressions in the ground around the retaining wall, particularly on the top surface, can lead to pooling, which will erode the stone faster. Thus, you will want to replace any missing soil quickly, so that you don’t get pools of water every time it rains throughout the year. Replant Any Dead Spots Overall, soil integrity is going to have the most impact on how well your wall stays in place. If the soil behind it starts to loosen, then it can collapse the structure of the retaining wall much faster than any surface cracks. Fortunately, one of the best ways to keep the dirt compact and sturdy is to use plants to maintain your retaining wall. Their roots will help hold the soil in place and reduce erosion. In the spring, you’ll likely notice some dead spots along the wall, so you should take the time to replant as necessary. Remove dead patches of grass and seed the ground so that new grass will take hold. If you let the dead parts multiply, it could lead to collapse down the road.   Contact New Life Rockeries Today Don’t let the winter affect your retaining wall. Whether you need to repair an existing structure or you’d like to add a retaining wall to your property, we can help. Contact us today to get a quote and see how we can transform your yard into a spectacular one.

Read More »

Modern Designs: 8 Water Feature Trends to Watch Out for in 2019

As the new year gets well underway, we finally get to turn our attention to spring. Even though it might not feel like it,  warmer weather is on the way, and with it comes the prospect of spending time outside, enjoying mother nature, and all she has to offer. As you think about this, you’re probably picturing your own yard, and wondering what to do to get it ready. Or, maybe you’re thinking it’s time to add something new. Either way, water features are a hot item that has been growing in popularity over the past few years as their prices have come down. If you’ve thought about adding water features to your yard, there’s no better time than right now to see what’s out there. Here are some of the hottest water feature trends for 2019: 1) Conservation This isn’t an individual design trend, but it will impact whatever designs you ultimately look at. As more and more people are thinking about humanity’s impact on the planet, the idea of conservation becomes more important. Water is a scarce resource in some parts of the world, so it only stands to reason that any water features installed should use this precious commodity wisely, without wasting. As you think about your options, consider your yard’s overall water footprint.   2) Smart Designs One hot trend is the use of “smart” technology that comes with Alexa, Siri, and other smart home options. You can integrate this technology with your smart home hub for added convenience, turning them on and off and changing features at your leisure.   3) Elegant and Formal For many, the yard is a place to relax and enjoy the finer things in life. In water features, this trend is shown by the prevalence of sleek, modern stylings. These installations boast clean lines and curves and often feature cascading water designs that incorporate darker grays or “greige” colors. These can be stand-alone features, or they can also be integrated into existing water elements that you already have, such as a pool or a pond.   4) Go Pondless Another current trend is the pondless water feature. This type of feature has a fountain or other running water element that makes it all the way to go the ground. Unlike a pond feature, however, the water is then collected into an underground reservoir and sent back to the top. The result is a continuous running water feature that takes up very little space and is easy to clean and maintain.   5) Sheet Waterfalls and Fountains The concept of the fountain or waterfall is certainly not new, and even though these are always in style, we thought we’d focus on one current trend with these types of installations: the sheet design. By “sheet” we simply mean that the water comes out in a flat, elongated sheet, rather than a traditional spout. This mainly adds an aesthetic appeal, as the resulting sheet of water is very beautiful to look at. The increased surface area also provides a louder, but more relaxing sound overall. Not into sheet waterfalls? The good news about this idea is that you can really have your water come out in any shape or design you choose. The possibilities are virtually endless! 6) Water Spouts Not just for a day at the water park: larger water spouts are now becoming a hot item. These are spouts that are installed in the ground and shoot out jets of water. Typically, they are installed around a central area, and they can be programmed to spurt in intervals, in succession or really in any sort of pattern you want. This type of spout can provide your kids with a fun distraction on a hot summer afternoon, but can also provide a touch of beautiful whimsy to your yard.   7) Lighting You might not think of lighting as a water feature, but good lights can truly enhance a water feature and turn it into something better than it already is. With the incorporation of inexpensive lighting such as LEDs, it’s possible to provide bright light for a fraction of what it used to cost. From there you can choose a variety of programmable colors, which gives you the option to change your overall lighting scheme as your mood changes. You can even take lighting further with the advent of smart lights. Hook your lights up to your Alexa, Siri or your Google Home Assistant and enjoy an endless amount of programming possibilities.   8) Use Other Elements Another design trend that applies across the board is to include elements that might already exist, like your patio design, with your water feature. If you have a patio, fire pit, backyard area or some other outdoor installations already in place, work with those to incorporate a unique and seamless water feature that complements your backyard perfectly. Create the perfect water feature design that turns your entire yard into a single, livable space.   Call on Us Intrigued? Don’t let this opportunity to get ready for spring pass you by. Contact us at New Life Rockeries today to get started on your newest design!

Read More »

Exterior Home Improvements that Increase the Comfort and Aesthetics of Your Home

When it comes to home improvements, the yard is often the most overlooked portion. Sure, we all want a big yard to host parties and allow our families to engage in outdoor recreation, but if you’re just concentrating on landscaping around your home, you’re missing out on not only the opportunity to create a dream spot for everyone to enjoy, but you’re also overlooking improvements that can increase the value of your home. In fact, according to John Gidding, host of HGTV’s show Curb Appeal, the return on investment for professional landscaping contractor can be as high as up to 150 percent. With numbers that attractive, it may be time to review your backyard and all the things you can add to make it the oasis you need and buyers want. After all, you’ll not only be able to take joy in your surroundings, if you decide to sell your home, you’ll have an edge in a competitive market. The dramatic increase in home value that can be realized through proper landscaping is no surprise to New Life Rockeries. In operation since 1975, we’ve had client after client take the plunge to have beautiful, long-lasting rock-based landscaping added to their yard. Why stone? It’s beautiful, and it’s a durable, natural material. Our clients feel secure that their new landscaping will continue to improve their surroundings for years to come. With service areas throughout the greater Seattle area, many of our clients want to install landscaping that compliments the natural beauty found in our state. Rock and stone materials in yard improvement are unparalleled materials when used to achieve an organic landscaping feature. Types of Improvements Best of all, you don’t have to go to extremes when you choose rock as the material for your landscaping projects. The visual and functional impact of even a small installation can change the entire look and feel of your yard. Let’s review some ways you can incorporate rock and stone into your landscaping: Stone retaining walls – Not only are they gorgeous, but retaining walls can also be placed to solve common yard complaints. If you have an area that’s prone to erosion or always seems to keep water after a heavy rain, a properly situated stone retaining wall can do wonders for your yard. It also gives homeowners the opportunity to further add foliage and flowering plants that can make your yard a work of art. Retaining walls truly allow you to make use of previously neglected areas of your yard. When you install a rock retaining wall, you know that the feature will withstand the elements. New Life Rockeries retaining wall contractors take care of everything you need, including design, excavating, and sod. Rain gardens and ponds – For homeowners searching for an ecologically friendly solution to areas of their yards that retain water, or who simply want to enjoy the tranquility of a backyard pond, few things can compare to a stone-lined water feature. Once installed, native plants can be incorporated to further maximize drainage. With New Life Rockeries, you even have the option of having a waterfall built in conjunction with your pond, which allows you to create maximum impact with your feature. Stone pathways – It’s difficult to imagine a more romantic look for your yard than stone pathways, surrounded by incredible landscaping. The strength and beauty of rock are ideal for this application. Stone pathways are ideal for either simply designating walking paths through your yard, or creating a garden feature with plants spaced between the walkway. Patios – Patios have been trending in exterior home improvement projects for the past few years, and when you consider the ease a well-installed patio adds to outdoor entertaining, it’s not difficult to see why. Whether you choose to add a small, quaint patio with a rock floor or an elaborate, raised patio, a designated place to entertain outdoors is always an excellent choice. Stairs – You can truly make your home your castle with the installation of stone stairs. They’re beautiful and can give your home brand new curb appeal. Flagstone is one of the most popular materials chosen for stairs, due to its ease in use and minimal upkeep once installed. Flagstone is available in a variety of colors and is relatively easy to work with. We hope this quick overview of the uses of stone and rock in your landscaping has inspired you to take a new look at your yard. If you’re ready to consider your options, contact New Life Rockeries for a free, no-obligation quote on your dream project. Remember, we’re not only specialists in rock and stone installation, but we can also help you realize any dream you have for your home’s landscaping. We can provide turf installation, planting, and many other landscaping needs. With over 35 years in the landscaping business, our licensed contractors are experts at design and installation. We take great pride in providing our clients with fast, efficient services and our excellent reviews. Don’t spend another summer with a plain, boring yard, let New Life Rockeries and get started on your very own backyard paradise.

Read More »

Everything You Need to Know About Installing a Backyard Waterfall

Having a beautiful lawn year round can be one of the key features of giving your home the gorgeous street appeal that you want it to have. It is after all the first impression that you make with your friends, family, neighbors, and anyone that comes by your home. What about having something that makes your home gorgeous that is just for you and your family? Many homeowners consider adding or building water features on the front of their home, but truth be told, having a water feature in your backyard is equally tranquil. Not only does it give you and your loved ones the perfect sanctuary to unwind and relax, but it also adds a visual and financial boost to your home. We realize that adding a water feature to your home can be an intimidating process. Based on the backyard waterfalls and ponds that you have seen, you may already realize that this isn’t going to be an overnight install. Which is why we are going to walk you through everything that you need to know about installing a backyard waterfall. Before you Get Started Here are a few items that you should take a look at before you get started with construction. 1) Using Your Space The first and most important thing that you need to decide when you are working on your own backyard waterfall is how you are going to use that space. This decision may be easier for some and more difficult for others, and largely depends on the amount of space that you have in your backyard. We recommend considering how much of your backyard you need to keep open as functional space. That will make it an easier decision when it comes to configuring the aesthetic space that your backyard waterfall is going to occupy. 2) Low Vs. High Maintenance The next item that you need to consider is whether you want to have a waterfall that is low or high maintenance. You can get elaborate and decadent with your waterfall as you could possibly imagine, or you could simplify it and make it as easy to take care of as you like. 3) Deciding on your Style Before you go into digging up space for your backyard waterfall, you should go into the process with a good idea of the look of the waterfall that you want to create. This can include how you want your pond to look, rock placement, and the type of rock that you want to use. What plants or greenery are you going to be including around your waterfall?   Getting Started 1) Outline Your Area Now that you have a great idea of where your waterfall is going to be, you may want to use some garden hose and/or some paint to outline the area. Make sure that you do not move around the perimeter of your waterfall while you are preparing the area. 2) Determine the Slope or Drop The larger the drop in your waterfall, the steeper the slope. This is going to require a more powerful pump to return your water back to the top of the waterfall, and pumps can get really expensive. If you are looking to save some time and headache for yourself, you don’t need a lot of slope to make a gorgeous waterfall. A good rule of thumb is that for every 10 feet of stream that you have, include at least two inches of slope. 3) Clear Out Your Space If your soil is soft and you are able to dig, the first thing that you need to do is dig out the area that you are going to be using for your waterfall. If you live on tougher soil, you may want to consider building your waterfall above ground. Having your waterfall above ground is going to be a little different in that you are going to be using stones for the base of your waterfall. 4) Installing the Liner After you have dug out the space for your waterfall, you are going to need to add some layers above ground to protect your property and your waterfall. For the first layer above the ground, you are going to want to add a thick layer of landscaping fabric. Next, you are going to need to lay rubber pond liner over that, making sure that there are no splits or breaks in the liner, to prevent leaks in the waterfall and your pond. 5) Install Your Pump and Hose After you have your liner down, you are ready to set up your pump and hose. During this part of the process, you can use boulders and sturdy rocks around the pump and the hose to secure the key facets of your waterfall, in place. 6) Finish It Up After that, you are just about all set! You can go ahead and fill up your pond, which is what will give your pump the ability to circulate your waterfall. You can add any additional rocks, gravel, plants and other greenery to your waterfall. B&D has been landscaping and adding waterfalls to yards for over 30 years. If you are interested in having an experienced landscape contractor help with the installation of your backyard waterfall, contact us for a free quote today and with any questions you may have.

Read More »

7 Tips to Help You Manage and Prevent Flooded Backyards

Prevent Flooded Backyards You take excellent care of your backyard, but all it takes is one massive downpour to ruin all of the hard work that you have put into your lawn care. Depending on where you are in the country, you may experience rain from time to time, and the occasional rain or thunderstorm. There is a good chance that you have dealt with in-climate weather like this before, and in that case, you may have an idea of what you need to prepare your lawn for. On the other hand, if you have bought a new property, moved to a new state or city or have never dealt with weather like this before, there are a few things that you should know about preparing your backyard for flooding. Here are some of our top landscaping tips for how to manage and prevent flooded backyards. 1) Make Sure that your Yard is Graded One of the first things that you should take a look at on your property is how your yard is graded. This process is really as simple as going outside and taking note of how your yard slopes around your home. Is there a hill or multiple hills that are sloping down into your backyard? Could they present issues with flooding? Your home is going to be most secure when your backyard is sloping away from your home. This will help to ensure that the rainwater will run off away from your home, instead of toward it. This isn’t always the case. If your backyard slopes down toward your home, you may want to talk to an expert to make sure that you have the proper mechanisms in place to protect your home from flooding and water damage.   2) Add New, Absorbative Soil Another way that you can prevent flooding damage is to make sure that you have fresh, healthy soil around your backyard. Keeping your soil healthy is a matter of making sure that you give your soil plenty of fertilizer, and making sure that you are watering your soil and plants regularly.   3) Add Mulch Around the Yard Mulch is yet another excellent way to help prevent flood damage to your yard and your home. Mulching around your house and around gardens or any lined areas that you have plants or soil is a great way to help absorb as much rainwater as possible. To get the most out of your mulch, we recommend having a thicker layer of mulch (3-4 inches) in the soil around your home. The mulch will help maintain the integrity and placement of your soil, the mulch will absorb water on its own and help the soil absorb water as well. When mulching around your home, make sure that you keep your mulch a safe distance from your house, to make sure that the wet mulch and soil doesn’t damage your lining.   4) Take Care of Your Grass Healthy grass needs water to stay healthy and is necessary for continued growth. This is why having healthy grass is so valuable in flood prevention, making sure that you water, fertilize, and mow your grass is a great way for helping your grass stay healthy and absorbent.   5) Grow New Grass If you notice that there are dead patches of grass in your backyard, we recommend taking care of that immediately. As we mentioned previously, having a healthy lawn is one of the best ways to help absorb rainwater in the event of a flood.   6) Place Native Plants and Trees Throughout your Yard Having plants throughout your backyard is another great method for mitigating the damage that a heavy downpour and flooding can cause. Native plants are going to be best suited for the amount of moisture and annual rainfall, in your area. This is going to make them the most prepared to absorb that rainwater and runoff in the event of a storm or massive amounts of rainfall. They are excellent for redirecting runoff and absorbing excess water. There are several reasons that you should go with native or indigenous instead of exotic plants or plant species that are not native to your area, namely that too much water may kill the plant. This would make the plant significantly less effective in assisting with your flooded backyard.   7) Use Rain Barrels Another great way that you can redirect water during a downpour is by utilizing rain barrels. Rain barrels can be placed at the end of your downspouts to capture runoff water from your roof. They are incredibly helpful in funnelling water away from your home and preventing damage to your yard and your house. Interested in some other ways that you can prevent and manage flooding in your backyard? Contact us today with any questions.

Read More »

Paver Patio Ideas

Paver patios can come in an infinite number of gorgeous arrangements and can be made with a variety of different materials—a term known as hardscaping. You can make all shapes and sizes of paver patios from small, quaint outdoor arrangements to large, elaborate outdoor setups that would be perfect for hosting, or just kicking your feet up with the family. In doing your research on different styles of paver patios, you may have noticed that many paver patios tend to share some of the same themes and accouterments. If you are interested in building your own paver patio, there are several essential elements that all outdoor areas should include.   1) Seating Area The first and perhaps the most important items that you are going to need on your paver patio is a comfortable seating area. A paver patio is meant to be a relaxing escape that you can have within the vicinity of your own home. You may want to look into several different seating options including benches, chairs, and loungers. Depending on the aesthetic that you are trying to create with your patio, you may select a variety of different seating options to give this outdoor area some added flair and comfort. 2) Grill Another favorite use for a quality paver patio is for grilling. One of the best parts about having this enjoyable outdoor space is using it to enjoy cooking outdoors. Your patio is the ideal outdoor space that you can use to enjoy the fresh air while you are grilling for your family and friends. 3) Fire Pit In looking at dozens of different designs and layouts for paver patios, you may notice that many of them have some type of centerpiece, that brings this outdoor space together. One of the most common centerpieces that you see on paver patios are firepits. What makes fire pits wonderful for outdoor patios is that they are perfect for just about any time of year. Having a fire pit in the summer is great for roasting marshmallows and keeping the bugs away. It is perfect for keeping you warm while you enjoy the crisp winter air. 4) Water Feature If you are in fact going down the route of looking for the perfect centerpiece for your paver patio, you may also want to take a look at adding a water feature. Though these are traditionally more costly in terms of money and the time that you are spending in maintenance, a nice water feature is a great way to set off the entire area. Not only is adding a water feature to your outdoor area absolutely stunning, in giving your paver patio an added level of vibrancy, they are also incredibly peaceful. We would advise that you take your time in exploring the various types of water features that you can add to your patio area before you make a final decision. 5) Tables Another one of the most common pieces of furniture that you will see on a nice paver patio are tables. Tables can combine several of the different elements that we are taking a look at today, and can easily be the centerpiece of your patio, and/or cover the entire seating area of the patio. If you are planning on adding a grill to your paver, a table could be the perfect addition to your outdoor area so that you can cook outdoors and eat outside as well. They are the perfect place to enjoy your coffee in the morning or your dinner in the evening, and they serve as a great place to host your family and friends. 6) Umbrellas Whether you have a table or just a general seating area on your patio, you may also want to look into adding some umbrellas. Umbrellas are both an excellent design component and functional piece of any outdoor area. They look great, and they will keep you cool while you are enjoying your outdoor space in the middle of summer. 7) A Nice View This is part of your paver patio that you can’t buy in a store. If you have a nice view around your home, be sure to plan the arrangement and organization of your patio around it. Your patio is the perfect way to enjoy the outdoors and nature, and making sure that you fit your paver to the natural beauty around you is critical for creating the perfect outdoor environment, and years of great memories to come. 8) A Path Last but not least, adding a path to your paver patio can be another functional and beautiful element to add to your outdoor patio space. Much of how you design and set up the path from your home or elsewhere to your paver patio is going to depend on the distance that you have to close and the vibe that you want to create. A direct path can be just as gorgeous as a winding path that leads to and from your paver. Tools and Materials You Need for Building Your Paver Patio Assembling the right tools is the first step to making your backyard paver patio ideas come to life. Patio Material The biggest hurdle in building a paver patio is finding the perfect material. Cheap paver patio ideas rely on inexpensive materials like concrete for a simple but elegant design. On the other hand, brick paver patio ideas can create a stunning design at a higher cost. Painter’s Tape Paver patio projects can get out of hand quickly without definitively set boundaries. Painter’s tape can help you section off a manageable area for your patio and keep your simple paver patio ideas small scale. Reference Photos Even small paver patio ideas are hard to visualize without proper references. While working, looking at reference pictures can help you craft your perfect outdoor hangout area.   Tips for Choosing the Right Paver Patio Design Ideas Choosing the Right Location One of the best ways to settle on the perfect paver

Read More »

Ponds, Fountains, and More: How to Winterize Your Water Features

Winter is just around the corner, which means that before you know it, it is going to be here. You may already be busting out the boots, long sleeves, snow gear, and holiday decor. A winter item that may be taking a back burner to the rest of the fun holiday festivities and winter activities is getting your pond or other outdoor water feature ready for the long winter. Taking care of your pond or outdoor water feature can already take a lot of work to maintain during the warmer months of the year. The last thing that you want to do is work even harder during the colder months of the year because you did not take the proper measurements and precautions when winterizing your water feature or pond. The good news is that you can take some simple preventative and ongoing care steps to make sure that you properly winterize your water features so that you can save a lot of time and hassle this winter. For Water Features Let’s take a look at a few ways that you can prep and take care of your water feature this winter 1) Clear out Plants And Algae The first thing that you want to do when you are winterizing your water feature is making sure that you clear out any plants, debris, and algae. The main reason that we want to do this is to keep wet debris like leaves from clogging up your water feature. You may need to vacuum or pressure wash out any debris that is clinging to the bottom of your water feature. 2) Drain Your Water Feature Now that you have cleared out the plants and the debris from your water feature, you are going to have to make sure that the water is completely drained. You need to be sure that the water is drained out of the main basin of the feature, and you have to be sure that all of your water and plumbing lines are clear as well. You don’t want to have to deal with your pipes freezing over when the cold winter weather blows in. 3) Remove the Pump from Your Water Feature If your water feature has a pump, you are going to want to make sure that you take it out and store it somewhere safe. Even without the feature itself being in use, cold weather and harsh elements can damage your pump. Make sure that you store your pump in a warm, dry place for the winter, so that you can reinstall it when the weather starts warming back up again. Winterizing Your Pond Ponds can be a slightly different story when it comes to preparing them for winter, in that you can clear it or keep it running. The frozen water on a pond can make a beautiful scene over winter and the holidays. 1) Clear Debris From Your Pond If you are going to clear your pond for the winter, you are going to need to make sure that all debris and leaves are clear from your pond. This is going to be critical in whether you choose to keep your pond filled or empty, during winter. 2) Maintain Chemicals Keeping your pond filled during the winter months is going to require some care. You need to be sure that you have the right combination of chemicals and coldwater bacteria so that you can keep your pond clean and crystal clear, all winter long. 3) Make sure the Water Is Circulating If you want to prevent your water from freezing, you are going to need to make sure that the water in your pond is circulating. This is especially important on those freezing nights and major cold fronts. 4) Draining Your Pond and Removing the Pump On the other hand, if you are going to be shutting down your pond for the winter, you are going to need to make sure that you drain your water and remove your pump. As mentioned before, store your pump in a safe warm place during the winter to help preserve it. That way, it will be ready to be reinstalled when you get into the spring and summer. Get Ready for Winterizing Depending on where you are located, you may have seen some freezing nights and even snow already this fall! The sooner that you get started with winterizing your ponds and/or water, the better prepared that you will be for winter. Need help with winterizing your water feature? Contact us today and get a quote.

Read More »

Hardscaping Insider: Differentiating Rockeries and Retaining Walls

If you’re like most homeowners, you want to add some vibrancy and a centralized focal point to your yard. But what’s the best way to go about it? For many people, the idea of adding hardscaping such as a retaining wall or a rockery is ideal, but all too often, there’s some confusion as to the difference between the two. However, because they both have different purposes, we want to make sure that you understand the best way to make them work for your yard.    What is a Rockery? Simply put, this is a rock garden that uses a variety of loose stones and alpine plants. Typically speaking, rockeries are used on a slope, but they can be deployed in a variety of areas, making them both versatile and eye-catching. What is a Retaining Wall? While a rockery is mostly there for decoration and aesthetics, a retaining wall serves a particular purpose. These installations are there to either terrace your yard or hold back soil so that it doesn’t erode. As with rockeries, they are best utilized in sloped areas, but you can build a retaining wall almost anywhere. How to Decide Which One is Best Each yard is different, so you may benefit from either a rockery or a retaining wall (or both, if you have space). To help you figure out which option is ideal for your situation, consider these questions. Related Article: Rock Walls Landscape How Much Space Do You Have? For the most part, rockeries require more space than a retaining wall. Because you have to install both rocks and plants, you need to be sure that you have sufficient room for both. Retaining walls can be as small or as large as you like, although if they’re more than four feet high, you’ll have to get a construction permit. What is Your Budget? Because rockeries don’t have to follow any set pattern or require a foundation, you can install one for much less than a retaining wall. Comparing the costs of different rocks and alpine plants, you can usually complete your project for less than you may imagine. With retaining walls, the price comes from a few factors, including- Cost of rocks and building materials The scope of the project (how much material do you need) Drainage pipes What Aesthetic Do You Want? Rockeries are ideal if you want to incorporate a lot of plant life into your yard. Although you can mix and match different designs for a retaining wall, the fact is that it will be a lot of masonry without much in the way of natural vegetation. The other thing to consider about the appearance is that rockeries can be more appealing because of the variety in stones and plants. Retaining walls will be much more uniform and can make your yard seem more utilitarian in the process. How Much Maintenance Does It Need? When building a retaining wall, you have to create a solid foundation, as well as install a drainage pipe so that it won’t erode over time. However, as long as you do the right preparation at first, you don’t have to maintain the wall. In some cases, you might have to clean it or remove weeds from between the stones, but that’s it. Rockeries are similarly low maintenance, but it mostly depends on the kinds of plants you install. While the roots shouldn’t disturb the stones much, you will have to worry about pruning and treating the plants. Depending on where you live, this may require more effort, especially if you don’t get much rainfall. Practicality For the most part, rockeries are built for decoration, while retaining walls serve a purpose. However, that being said, you can incorporate both elements into a functional outdoor space. For example, you can create a pathway through your rockery with ease – all it takes is a line of smooth stones, and you’re all set. With a retaining wall, you can add steps and incorporate it into a walkway. Overall, though, it’s easier to make a retaining wall multi-functional because you’re building it from scratch. Thus, if you want to add elements like lighting, seating (i.e., putting a bench into the wall), you can plan it all out from the outset. Rockeries, on the other hand, are limited mostly to walkways, water elements (such as a pond or fountain), and not much else. So, if you’re trying to build a practical outdoor area, a retaining wall contractors will be a better option. Contact New Life Rockeries Today No matter which option you choose, you have to make sure that you’re starting with the best materials. At New Life Rockeries, we have a wide selection of stones and rocks that will work well in both rockeries and retaining walls. Our design team can also help you pick out the elements that will make your installation shine. Whether you plan on building everything yourself or you want some professional assistance, we’re here for you. Contact us today to find out what options you have and how you can get started on your outdoor project.

Read More »