How to Lay Flagstone – The Right Way
Ever wondered how to lay flagstone yourself? While home and garden social media accounts frequently tout laying flagstone as a great “DIY” activity for your yard, there’s a bit more to it than most people expect.
This is an educational guide explaining how this type of project works. If you need professional installation in the greater Seattle area, paver walkway contractors for pricing, photos, and a free estimate.
Like all things, doing it RIGHT is different than just getting the job done. With that in mind, we at New Life Rockeries think it would be helpful to introduce you to what goes into installing flagstone, and then you can decide if you’re up to the task!
Tools of the Trade
No flagstone installation can begin without the appropriate equipment first! With that in mind, here are the minimum tools we recommend having on hand.
- Flat nose shovel
- Wheelbarrow
- Metal rake
- 4’ level
- Large bucket
- Small hand shovel
- Measuring tape
- Hand tamper
Of course, you can always get fancier — but these are enough for you to get started.
Laying Flagstone
Laying flagstone is best summarized in the following seven steps:
- Planning
- Digging
- Adding base layer gravel
- Installing leveling sand
- Puzzle assembly
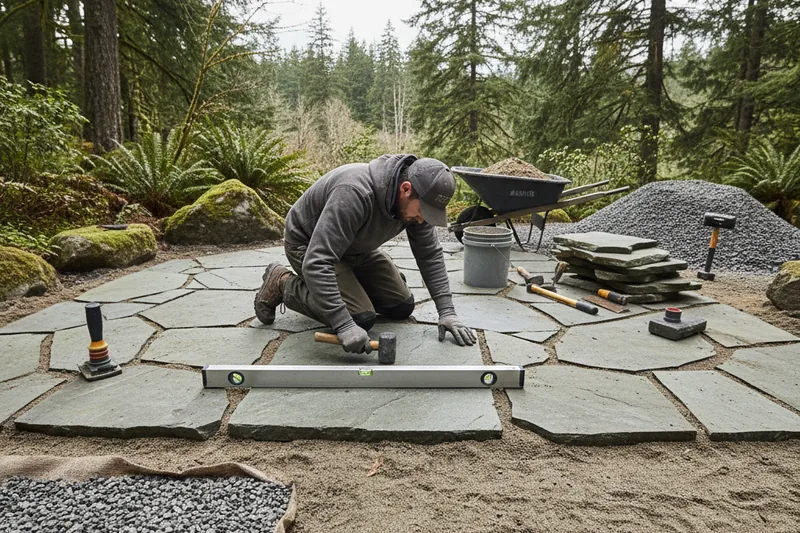
- Level that flagstone!
- Finish up the gaps
Any proficient flagstone installer will tell you that each step to the process here is its own micro-form of art. But these are the basics to get the job done.
How to Lay Flagstone – The Process
Below, we’ll give you some insight on what you can expect if you become the new architect for your flagstone landing!
- Planning: Before we can talk about setting flagstone, you’re going to need to plan out exact dimensions for your flagstone patio. You’ll need to consider the grading of your yard, stone size, and any utility lines before you break ground.
- Digging: Knowing how to install flagstones means being handy with a shovel. Once you’ve got a hunch of how big your flagstone patio is meant to be, you’ll want to dig down about 6”. This gives you 3-4” for the gravel base, 1” for any necessary leveling material, and the slabs themselves, of course.
- Add your Gravel Base Layer: Remember that 3-4” of gravel we mentioned? You’ll need to fill in your dug-out trench with a sturdy base layer of gravel and compact it nice and tight. It’s the foundation, after all!
- Leveling Sand: There are specialized sand and rock products that can assist you in leveling your base layer. This will be important for having an even patio to walk on.
- Puzzle Assembly: Now that you have your flagstone base, time to let loose and design your patio contractors. your next yard project with us.
Need a Professional Flagstone Walkway?
New Life Rockeries has been serving the greater Seattle area since 1975. We provide free, no-obligation estimates for all projects.
See Our Paver Walkway Contractors Service →
Written by
Keith EneixCo-Owner, New Life Rockeries
Keith Eneix is a co-owner of New Life Rockeries alongside his brother Neil Eneix. He began helping with operations in 2007 and has been involved ever since. He writes from nearly two decades of hands-on experience with retaining walls, rockeries, and hardscaping across the greater Seattle area.
View full profile →Ready to Start Your Project?
New Life Rockeries has been building retaining walls, rockeries, and hardscaping across the greater Seattle area since 1975. Get your free estimate today.