How to Build a Timber Retaining Wall (Step-by-Step Guide)
How to Build a Timber Retaining Wall: Step by Step Guide
Timber retaining walls are a popular choice for homeowners who want to add a natural and rustic touch to their landscaping. Not only do they look great, but they are also relatively easy to build and can be a cost-effective solution for retaining soil and creating level areas in your yard. In this step-by-step guide, we will walk you through the process of building a timber retaining wall that is both functional and beautiful.
Step 1: Planning and Preparation
Before you start building your timber retaining wall, it is important to do some planning and preparation. First, you will need to determine the location and size of your wall. Consider the slope of your yard and the amount of soil that needs to be retained. You will also need to check with your local building department to see if you need a permit for your project.
Once you have a plan in place, it is time to gather your materials and tools. You will need pressure-treated lumber, which is resistant to rot and decay. The size of your lumber will depend on the height of your wall, but a good rule of thumb is to use 6x6 timbers for walls up to 4 feet high. You will also need gravel for drainage, as well as a shovel, level, drill, and saw.
Step 2: Excavation and Leveling
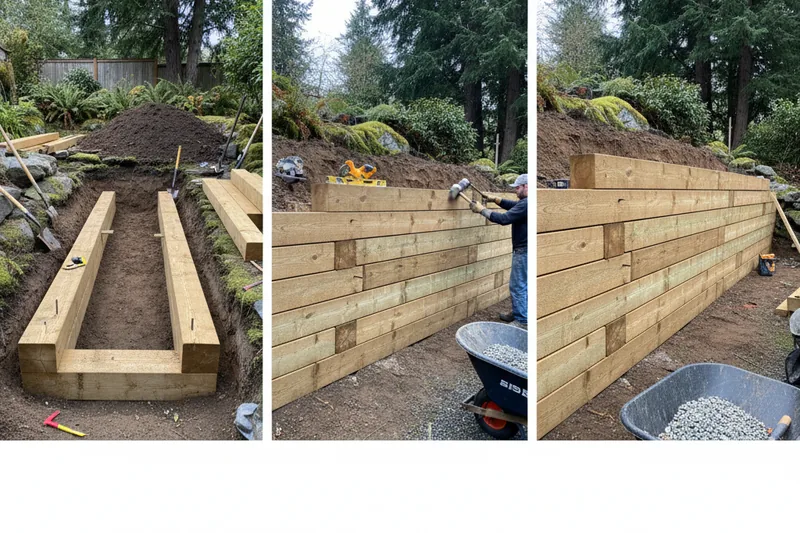
The next step is to excavate the area where you will be building your wall. Use a shovel to dig a trench that is at least 6 inches deep and 12 inches wide. The trench should be level, so use a level to check it as you go. Once the trench is dug, add a layer of gravel to the bottom for drainage.
Step 3: Laying the First Course
Now it is time to start laying the first course of your timber retaining wall. Place the first timber in the trench and make sure it is level. Use a drill to create pilot holes and then secure the timber with rebar spikes. Continue laying the first course, making sure each timber is level and snug against the previous one.
Step 4: Building the Wall
Once the first course is in place, you can start building up the wall. Stagger the joints of each course to create a stronger wall. Use a drill to create pilot holes and then secure each timber with galvanized spikes. As you build the wall, be sure to backfill with gravel to provide drainage and support.
Step 5: Finishing Touches
Once your timber retaining wall is complete, you can add some finishing touches to make it look even better. You can add a cap to the top of the wall to give it a finished look. You can also add landscaping fabric behind the wall to prevent weeds from growing through. Finally, you can plant some flowers or shrubs in front of the wall to add some color and texture to your landscaping.
Conclusion
Building a timber retaining wall can be a rewarding DIY project that can add both beauty and functionality to your yard. By following these step-by-step instructions, you can build a wall that is both strong and durable. If you are not comfortable with the idea of building a retaining wall yourself, you can always hire a professional to do the job for you. New Life Rockeries has been providing high-quality retaining wall construction services in the Seattle area for over 35 years. Contact us today for a free estimate.

Written by
Keith EneixCo-Owner, New Life Rockeries
Keith Eneix is a co-owner of New Life Rockeries alongside his brother Neil Eneix. He began helping with operations in 2007 and has been involved ever since. He writes from nearly two decades of hands-on experience with retaining walls, rockeries, and hardscaping across the greater Seattle area.
View full profile →Ready to Start Your Project?
New Life Rockeries has been building retaining walls, rockeries, and hardscaping across the greater Seattle area since 1975. Get your free estimate today.