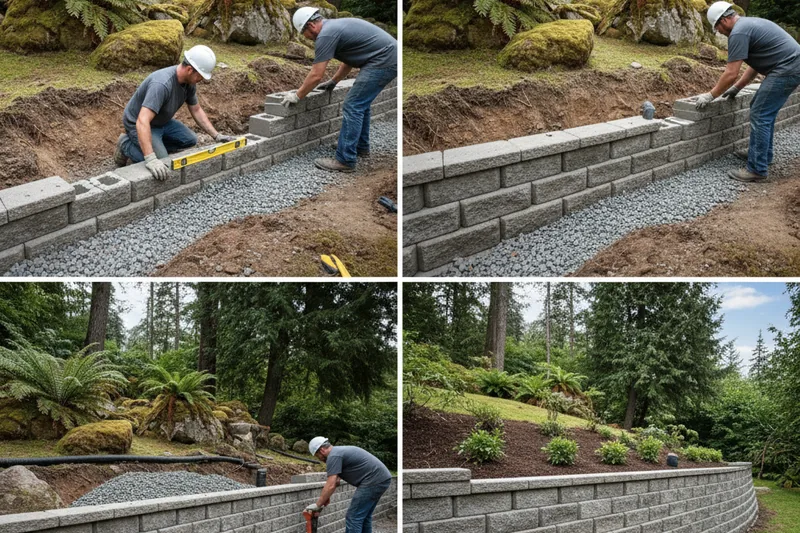
How To Build Interlocking Retaining Walls
Interlocking retaining walls rely on a series of flanges or pins and grooves that fit into one another. These interlocking wall blocks are simple to lay and strong — even without mortar. With each course fitting snugly into the one before, this is an ideal system for retaining wall contractors.
Process Involved to Build an Interlocking Retaining Wall
Lay Out Wall
Measure out where you’ll place your wall and create the trench for the first layer of interlocking wall blocks. Run a piece of a line along the length so that you can properly align each block.
Spread Landscape Fabric
Walk to the top of the slope and start laying landscape fabric a foot before the drop. Weigh the edges down and spread over the top of the hill. You may need several pieces of cloth — simply overlap them and weigh each edge down.
Place First Row of Gravel
Next, place four inches of gravel into the trench and spread it evenly. Tamp it down.
Lay First Course of Interlocking Retaining Wall Blocks
Check the manufacturer’s instructions here. Most companies suggest placing the first row back to front. Now set your first row, ensuring that each block squares up to the one next to it.
Gently tap with a rubber mallet to secure in place, ensuring that each block is level with the next.
Set Remaining Courses
Now it’s time to lay the remaining interlocking blocks. Retaining walls at this point seem to build themselves as long as you follow the manufacturer’s recommendations.
With interlocking retaining walls, it’s common to offset each alternate course by half or at least three inches. This improves the strength of the design.
Set Up Drainpipe
When you lay the third lot of locking blocks for retaining walls, start filling the gap between the wall and the slope with gravel. When the gravel reaches the second course, lay your drainpipe with the holes facing the ground. Place the outlet in a spot away from the wall itself.
Backfill Wall
Cover the pipe in gravel and continue to do so with every successive course for your interlocking retaining walls.
Tuck Fabric
Tuck the fabric when you’re close to completing the job. With one or two layers to go, fold the fabric over the gravel backfill and secure it behind the interlocking concrete blocks retaining wall.
Tamp Soil
Finish off the gravel layer by covering the landscape fabric with three inches of topsoil. Then, resod the area and plant as usual.
Apply Adhesive to Finish Your Interlock Block Retaining Wall
It’s now time to place the adhesive on the last course of interlocking blocks.
Place Capstones
The final step in making interlocking block retaining walls is to lay the capstones. Check the manufacturer’s recommendations for information on squaring the stones and adhering them.
Finish Base
Now spread out any topsoil that you have left. Pay attention to the base of the wall, and make sure that you fill in any gaps. Evenly spread out what’s remaining and tamp it down before putting down sod or planting.
Materials Needed to Build Interlocking Retaining Walls
- Work gloves
- Shovel or mattock
- Brick chisel and small sledgehammer
- Level
- Wooden stakes
- String and a line level
- Soil tamper
- Gravel (sharp, not rounded) or rock dust
- Interlocking stackable stones and toppers
Contact Us for a Quote!
Do you need help building interlocking retaining walls? Call New Life Rockeries at 425-584-6878 today to get your free competitive quote!

Written by
Keith EneixCo-Owner, New Life Rockeries
Keith Eneix is a co-owner of New Life Rockeries alongside his brother Neil Eneix. He began helping with operations in 2007 and has been involved ever since. He writes from nearly two decades of hands-on experience with retaining walls, rockeries, and hardscaping across the greater Seattle area.
View full profile →Ready to Start Your Project?
New Life Rockeries has been building retaining walls, rockeries, and hardscaping across the greater Seattle area since 1975. Get your free estimate today.